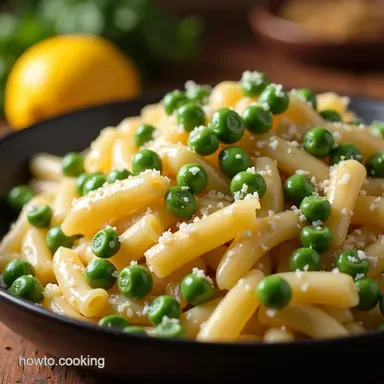
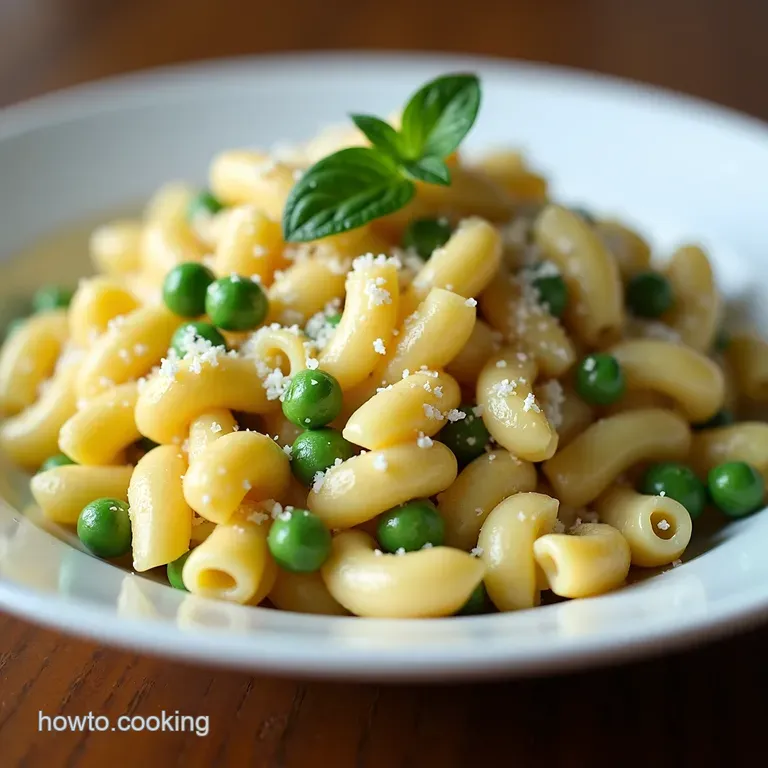
The Speedy Supper Creamy Onepot Pasta and Peas with Lemon Parmesan
- Why the One-Pot Method Reigns Supreme for Weeknights
- The Magic Behind This Creamy 1Pot Pasta and Peas
- Your Essential Arsenal for Flavourful 1Pot Pasta and Peas
- Seamless Execution: Cooking Your One-Pot Masterpiece
- Achieving Peak Creaminess Without Heavy Cream
- Elevating Your Base Recipe: Variations and Upgrades
- Storage Solutions for Leftover 1Pot Pasta and Peas
- Frequently Asked Questions
- 📝 Recipe Card
Why the One-Pot Method Reigns Supreme for Weeknights
In the realm of busy weeknight cooking, efficiency isn't just a bonus; it’s a necessity. The mantra of modern home chefs is simple: maximum flavour with minimal fuss. This approach is precisely why the one-pot method has surged in popularity, and nowhere is it more triumphant than in this glorious 1Pot Pasta and Peas .
Traditional pasta dishes often demand separate steps: boil the pasta, drain it (losing starchy goodness in the process), sauté the sauce ingredients, and then combine a recipe for a sink full of dishes by the time you sit down to eat. This streamlined approach bypasses all that culinary bureaucracy.
By cooking the Peas And Noodles directly in the simmering broth, we capture every bit of flavour released by the pasta starch and aromatics, resulting in a dish that requires only a single saucepan for the entire process.
It’s the definition of a culinary shortcut that never compromises on taste.
The Magic Behind This Creamy 1Pot Pasta and Peas
The beauty of this One Pot Pasta creation lies in its inherent simplicity yet impressive textural outcome. We are aiming for that rich, velvety sauce often associated with slow cooked risottos, but achieving it in under twenty minutes.
This specific 1pot pasta and peas recipe leverages the friction and starch released during the cooking process to thicken the liquid naturally.
Solving the Post Dinner Cleanup Dilemma
Let's be frank: nobody looks forward to scrubbing burnt-on pasta residue from a colander and a large stockpot. By utilizing only one deep saucepan, we dramatically shrink the required cleanup. After plating, a quick rinse and wash of that single vessel is all that stands between you and relaxation.
This drastic reduction in post meal effort makes simple dishes like this Pasta With Peas Recipe a reliable go-to, even on days when motivation is running low.
Flavor Infusion Secrets of Single Pan Cooking
When ingredients cook together concurrently, they don't just coexist; they actively integrate. The garlic and shallot sautéed at the beginning release their base notes into the oil, which then coats the dry pasta as it toasts.
As the broth heats up, the pasta releases starches directly into that liquid, which is why we call for frequent stirring. This process emulsifies the broth and starch into a light, clinging sauce. If you were to drain the water, you’d be throwing away the engine of your sauce!
This integrated cooking method ensures every bite of our Simple Pasta With Peas is imbued with deep, complex flavour.
A Quick Culinary Win: Ready in Under 20 Minutes
For those moments when hunger strikes and patience wears thin, speed is paramount. With a prep time of just ten minutes (mostly gathering your components), and a total cook time hovering around eighteen minutes, this dish is genuinely ready from start to finish in under half an hour.
It rivals takeout for speed but far surpasses it in freshness and nutritional value, making it an absolute powerhouse among quick dinner solutions.
Your Essential Arsenal for Flavourful 1Pot Pasta and Peas
Successfully executing any recipe hinges on the quality of your raw materials. Because this dish has relatively few components, each ingredient needs to pull its weight. When preparing this Shells And Peas Recipe , focus on fresh elements and good quality pantry staples.
Sourcing the Freshest Components
Start by prioritizing your aromatics and cheese. The brightness of fresh garlic and zest is non-negotiable here; powdered substitutes simply won't deliver the vibrant kick needed to balance the starchiness of the pasta.
Choosing the Right Pasta Shape for Optimal Creaminess
The shape of your pasta profoundly impacts the success of the one-pot technique. We rely on the friction of the pasta scraping against the bottom of the pot to release starch, which thickens the sauce. For this reason, short, ridged, or concave shapes work best. Think medium shells, rotini, penne, or even campanelle.
These shapes trap the liquid and starch perfectly, ensuring an even cooking process and a cohesive final texture.
The Importance of high-quality Parmesan Cheese
If you take away only one piece of advice, let it be this: buy a block of Parmesan (Parmigiano Reggiano, if you can find it) and grate it yourself right before use. Pre-shredded cheese is dusted with cellulose or potato starch to prevent clumping in the bag.
When you try to melt this into your sauce, it doesn't emulsify; instead, it clumps or turns grainy, ruining the velvety texture we are chasing in this One-Pot Pasta and Peas . Freshly grated cheese melts seamlessly, becoming the final, glorious component of the sauce.
Related Recipes Worth Trying
- The HalfHour Hero Quick Pasta and Peas with Mint — Transform humble ingredients into a vibrant Pasta and Peas Dinner in under 30 minutes This easy pasta and peas recipe uses lemon and mint for an elegant...
- Luxurious Shrimp and Crab Seafood Lasagna Recipe — This Creamy Seafood Lasagna with Shrimp and Crab swaps ragù for white wine béchamel Its an elegant yet simple seafood lasagna recipe perfect for a special...
- Creamy Beef Mince Tomato Pasta Bake Recipe — Make the ultimate comforting Creamy Beef Mince and Tomato Pasta Bake This easy cheesy classic uses a silky béchamel for an incredible texture upgrade See...
Seamless Execution: Cooking Your One-Pot Masterpiece

The process itself is meditative if you respect the simmering phase. The key is not rapid boiling, but a consistent, happy simmer that encourages even cooking while slowly reducing the liquid. We begin by heating two tablespoons of olive oil in a large, deep saucepan over medium heat.
Add one medium, finely chopped shallot and cook until softened, about three to four minutes. Next, introduce three cloves of minced garlic, cooking only until fragrant about sixty seconds, minding carefully that it does not brown, as bitter garlic will taint the entire dish.
Then, introduce twelve ounces of your chosen dried pasta. Stir this dry pasta constantly for a minute or two to lightly toast the edges; this small step adds a wonderful depth, transforming simple Peas And Noodles into something more profound.
Achieving Peak Creaminess Without Heavy Cream
The transformation from liquid broth to creamy sauce is the defining characteristic of this method. It happens naturally, but only if you manage the heat and stirring correctly.
The Initial Simmer: Bringing Everything to Life Together
Once the pasta is lightly toasted, pour in four cups of low-sodium vegetable or chicken broth. Add half a teaspoon of freshly ground black pepper and about one teaspoon of salt, adjusting based on your broth’s salinity. Bring the entire mixture up to a gentle boil over medium high heat.
The moment it reaches this stage, reduce the heat immediately to a steady simmer. This is crucial a hard boil will cause the pasta to break down unevenly and stick.
Integrating the Frozen Peas at Just the Right Moment
Continue simmering uncovered, stirring every minute or two. This agitation is what releases the starch needed for thickening. After about twelve to fifteen minutes, the pasta should be approaching al dente and most of the liquid should be absorbed into a thick coating.
At this precise moment, stir in one and a half cups of frozen peas. They require very little time to cook. Continue simmering for two more minutes until those peas turn a vibrant, bright green.
The Final Stir: Emulsifying the Sauce with Cheese and Zest
Remove the entire pot from the heat source. This stops the cooking process and prevents the cheese from seizing. Stir in the zest of one medium lemon this acidity is vital for cutting through the starch and about half a cup of freshly grated Parmesan cheese.
Stir vigorously until the cheese has completely melted, forming a rich, smooth coating. For an extra layer of decadence, you may stir in a quarter cup of heavy cream here, though it’s entirely optional.
If the mixture seems too tight, add a small splash of hot water or extra broth until you hit that perfect, luxurious consistency.
Ensuring Evenly Cooked Pasta in a Single Vessel
The greatest challenge in single pan pasta is preventing the bottom layer from overcooking while the top layer remains hard. The solution lies in diligent stirring and managing the heat.
By keeping the temperature at a low, consistent simmer, the liquid evaporates slowly, ensuring the pasta absorbs moisture evenly from the bottom up. Always taste a piece near the end of the cooking time; it should be tender but possess that slight resistance at the center characteristic of perfect al dente .
Elevating Your Base Recipe: Variations and Upgrades
While this recipe stands beautifully on its own as a perfect Italian Pasta Side Dishes entry or a light main, it begs for experimentation. The foundational method is robust enough to handle robust additions.
Adding Protein Power: Suggested Add-Ins
To transform this into a complete evening meal, consider sautéing four ounces of chopped pancetta or Italian sausage until crisp before you add the shallots and garlic in step one; the rendered fat will further flavour the entire dish.
For leaner options, simple pan-seared shrimp or grilled chicken breast sliced on top works wonderfully, adding texture and substance without complicating the single pot cooking process itself.
Herbaceous Twists: Mint vs. Basil vs. Parsley
The herbs you choose can shift the entire profile of your dish. While fresh parsley is a classic, bright finisher, try substituting it with fresh mint. Mint is particularly brilliant when paired with peas and lemon zest, giving the dish an authentic, vibrant spring flavour.
If you prefer a sweeter, more classic Italian note, use fresh basil instead. Add your chosen herbs in the final minute of cooking or use them as a generous garnish just before serving.
Troubleshooting: Why Is My Sauce Too Thin or Too Thick?
The consistency relies heavily on how much liquid your specific brand of pasta absorbs. If, after removing the pot from the heat, the sauce seems too thin, simply return it to very low heat and stir in an extra tablespoon of Parmesan cheese and let it sit for two minutes; the cheese will help bind it.
Conversely, if it has become gluey or too thick (often due to sitting too long), stir in a few tablespoons of reserved hot water or extra broth until the desired creamy sauce texture returns.
Storage Solutions for Leftover 1Pot Pasta and Peas
Should you find yourself with leftovers though I often doubt this happens! refrigerate the One Pot Pasta in an airtight container for up to three days. Be aware that leftover pasta tends to absorb residual moisture as it cools, so it will be much firmer the next day.
To reheat, transfer the portions to a saucepan with a splash of water or milk, warm gently over medium low heat, stirring constantly until the sauce loosens back up. Avoid microwaving if possible, as it can dry out the pasta too quickly.
Frequently Asked Questions
Why is my 1Pot Pasta and Peas sticking to the bottom of the pan?
Ah, the dreaded sticky bottom! This usually happens when the heat is too high or you aren't stirring enough. Remember, we need that constant stirring during the simmer phase (Step 4) to release the pasta starch and prevent sticking.
Keep the simmer gentle not a furious boil and give it a good scrape every minute or two.
Can I use long pasta, like spaghetti, in this 1Pot Pasta and Peas recipe?
Technically, you can, but it’s a bit fiddly and not ideal for the one-pot method. If you must use spaghetti, break it into thirds before adding it to the pot; this makes stirring much easier and ensures even cooking. Short pasta shapes like penne or rotini work best because they distribute the starch more evenly.
I don't have vegetable broth; what's the best substitute for this creamy dish?
The broth is key as it carries all the flavour, so use the best liquid you have. Chicken broth is a fantastic, robust substitute. If you’re making a vegan version and only have plain water, you’ll need to boost the flavour by adding a teaspoon of good quality vegetable bouillon paste or a stock cube along with the initial salt.
How do I store leftovers, and does this recipe freeze well?
Store any leftovers in an airtight container in the fridge for up to three days. Be aware that the pasta will soak up even more liquid as it cools, making it quite thick almost like a baked pasta casserole!
It doesn't freeze brilliantly as the texture can become a bit mushy upon thawing, so it’s best eaten fresh.
Can I add some protein to this recipe without dirtying another pan?
Absolutely! The easiest way to keep it one-pot is by adding diced ham or cooked, shredded chicken during Step 6 when you add the peas. If you want to add something like raw sausage meat, brown it in the pot first (Step 1), remove it, cook the aromatics, then return it just before the liquid goes in. Easy peasy!
Onepot Pasta And Peas