Pizza Sliders: Velvety Cheese Pull

- Time: Active 15 minutes, Passive 20 minutes, Total 35 minutes
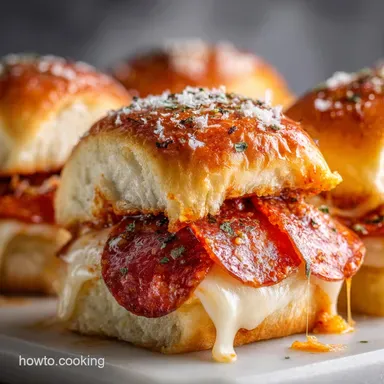
- Flavor/Texture Hook: Shatter crisp garlic crust with a velvety cheese pull
- Perfect for: Game day gatherings, busy weeknight dinners, or beginner friendly meal prep
- The Secret to Making the Ultimate Pizza Sliders
- Strategic Specs for Every Home Kitchen
- The Anatomy of Flavor: Quality Ingredient Analysis
- Selecting Your Culinary Tools for Success
- Mastering the Assembly: From Preparation to Plating
- Proactive Solutions for Common Culinary Mishaps
- Creative Adaptations for Every Palate
- Guidelines for Safe Storage and Sustainable Practice
- Presentation Strategies for the Family Table
- Myths Regarding Slider Preparation
- Recipe FAQs
- 📝 Recipe Card
The Secret to Making the Ultimate Pizza Sliders
Imagine the smell of roasting garlic and melted butter wafting through your kitchen, hitting that specific note that makes everyone suddenly appear at the island with plates in hand. I first stumbled onto this method during a chaotic Friday night when the local pizza place had a two hour wait.
I had a pack of sweet rolls and some leftover marinara, and honestly, the result was a complete revelation that my family now requests more than the actual takeout.
The magic happens when the sweetness of the Hawaiian rolls meets the savory, salty snap of the pepperoni. It's a balance of flavors that feels indulgent but stays wholesome when you control the quality of the ingredients. We've all had those soggy, sad sliders at parties before, but we aren't doing that here.
We're going for a specific structural integrity that makes every bite count.
You'll find that these come together with a confidence boosting simplicity. Whether you're feeding a pack of hungry teenagers or looking for a reliable appetizer that actually stays crispy on the buffet line, this method is your new best friend.
Let's look at what actually happens inside that oven to make these so successful.
Strategic Specs for Every Home Kitchen
The Lipid Barrier Technique: Brushing the interior bread with a thin layer of fat or pre toasting creates a hydrophobic seal. This prevents the marinara from migrating into the crumb of the roll, which is the primary cause of a soggy bottom.
Protein Cohesion: As the mozzarella reaches its melting point (around 130°F or 55°C), the protein strands stretch and entangle. Using freshly grated cheese ensures these strands aren't coated in anti clumping cellulose, resulting in a superior, velvety pull.
Maillard Reaction Finish: The garlic butter glaze on the top bun reacts with the sugars in the Hawaiian rolls. This creates a deeply aromatic, mahogany colored crust that provides a structural "snap" when you bite in.
| Method Type | Total Time | Crust Texture | Effort Level |
|---|---|---|---|
| Fast (These Sliders) | 35 minutes | Shatter crisp & buttery | Minimal prep |
| Classic (Dough based) | 3 hours 30 mins | Chewy & charred | High (kneading/rising) |
| Air Fryer Version | 22 minutes | Extra crunchy edges | Medium (batches required) |
Choosing the right approach depends on your schedule, but the slider method offers the best ratio of flavor to effort. If you are looking for a more traditional dough experience, you might enjoy my How to Make recipe for those slower weekend afternoons.
The Anatomy of Flavor: Quality Ingredient Analysis
| Ingredient | Science Role | Pro Secret |
|---|---|---|
| Hawaiian Rolls | Sugar rich base for browning | Keep the slab intact while slicing to maintain heat |
| Whole Milk Mozzarella | High fat content for emulsification | Grate it cold, but let it sit 5 mins before baking |
| Marinara Sauce | Acidic balance to the heavy fats | Use a thick, reduced sauce to limit water transfer |
| Unsalted Butter | Medium for garlic infusion | Use European style butter for higher fat/lower water |
The choice of bread is the foundation of the entire dish. While any dinner roll works, the specific sugar content in the sweet rolls allows for that beautiful caramelization that balances the acidity of the tomatoes.
| Servings | Roll Count | Cheese Amount | Pepperoni Layer |
|---|---|---|---|
| Family of 4 | 12 Sliders | 225g Mozzarella | Single layer (115g) |
| Small Party (8) | 24 Sliders | 450g Mozzarella | Double layer (230g) |
| Large Event (12) | 36 Sliders | 675g Mozzarella | Triple layer (345g) |
Selecting Your Culinary Tools for Success
To achieve the best results, having the right gear makes the process seamless. You don't need a professional kitchen, but a few specific items will help you reach that "shatter crisp" goal.
- Serrated Bread Knife: This is non negotiable for slicing the entire slab of rolls without squishing them into a pancake.
- 9x13 Inch Baking Dish: A ceramic or glass dish works well, but a metal pan will give you a slightly crispier bottom crust.
- Microplane or Fine Grater: Perfect for the 2 cloves of garlic and the 25g of Parmesan, ensuring the flavor is distributed evenly.
- Silicone Basting Brush: Essential for painting that 56g of melted garlic butter into every nook and cranny of the rolls.
- Aluminum Foil: This is your heat regulator to prevent the tops from burning before the cheese is fully molten.
Chef's Note: If you have a cast iron rectangular pan, use it! The heat retention of the iron creates a crust on the bottom of the rolls that is nearly impossible to achieve with glass. Just make sure to preheat the pan for 2 minutes in the oven before adding the rolls.
Mastering the Assembly: From Preparation to Plating

- Preheat the oven to 350°F (175°C). Note: A stable temperature is key for even cheese melting.
- Slice the rolls horizontally through the middle using a serrated knife. Work slowly until you have two distinct slabs.
- Place the bottom slab into your baking dish. Note: If you want an extra crispy base, bake just the bottom slab for 5 minutes before adding toppings.
- Spread the marinara (1/2 cup) evenly over the bottom slab. Note: Keep the sauce about 1cm away from the edges to prevent sticking.
- Layer the cheese by spreading 225g of freshly grated mozzarella over the sauce. Note: Freshly grated melts much more smoothly than bagged shreds.
- Arrange the pepperoni (115g) in an overlapping pattern. Ensure every slider has at least 3-4 slices for the perfect "snap."
- Place the top slab of rolls back on. For a variation on this layering, you can see how I handle similar textures in my Foolproof Italian Pepperoni recipe.
- Whisk the glaze by combining 56g melted butter, 2 cloves minced garlic, 1 tsp oregano, 1/2 tsp garlic salt, and 1 tsp parsley.
- Brush the glaze generously over the tops and sides of the rolls. Watch for the butter pooling in the crevices.
- Bake the sliders covered with foil for 15 minutes, then remove foil and bake 5 more minutes until the tops are golden and the cheese is bubbling.
Proactive Solutions for Common Culinary Mishaps
Why Your Pizza Sliders Get Soggy
The most common heartbreak in slider making is a wet, mushy bottom. This usually happens because the sauce has too much water or the vegetables (if adding any) released moisture during the bake. It's frustrating, but it's easily avoidable with a few smart moves.
| Problem | Root Cause | Solution |
|---|---|---|
| Soggy Bottom | Sauce moisture migration | Pre toast the bottom bun for 5 mins |
| Burnt Toppings | High sugar in rolls | Tent with foil for the first 15 mins |
| Dry Filling | Not enough cheese/sauce | Use whole milk mozzarella for better fat content |
Common Mistakes Checklist
- ✓ Pat your pepperoni dry: Use a paper towel to remove excess oil from the pepperoni before layering to prevent an oil slick.
- ✓ Grate your own cheese: Pre shredded cheese is coated in starch which prevents that velvety "pull" we all want.
- ✓ Don't skip the rest: Let the sliders sit for 5 minutes after pulling them from the oven so the cheese sets slightly.
- ✓ Check your garlic: If using a garlic press, ensure the bits are tiny so they don't taste bitter or raw on the crust.
- ✓ Use room temp butter: If you're mixing the glaze, ensure the melted butter isn't boiling hot when you add fresh herbs to keep them vibrant.
Creative Adaptations for Every Palate
Scaling this recipe is incredibly straightforward. If you're cooking for a larger crowd, the biggest challenge is oven space rather than the math. When doubling the recipe, I recommend using two separate 9x13 pans rather than trying to cram 24 sliders into one oversized sheet tray, as this ensures even heat circulation around the sides of the rolls.
If you are scaling down for a solo nutritious lunch, you can actually use a small toaster oven. Just reduce the cook time by about 5 minutes and watch the tops closely, as the heating elements are much closer to the bread.
| Original Ingredient | Substitute | Why It Works |
|---|---|---|
| Pepperoni | Sliced Mushrooms | Provides an earthy umami flavor. Note: Sauté first to remove water. |
| Marinara | Basil Pesto | Adds a bright, herbaceous punch with high fat content for a rich mouthfeel. |
| Hawaiian Rolls | Whole Wheat Sliders | Offers a nuttier flavor and higher fiber content for a more wholesome meal. |
If you decide to swap the base bread for a different texture, consider how the hydration levels change. For instance, using a sourdough roll will require a slightly longer bake to get the same level of crispness. You can learn more about different dough textures in my Foolproof How to recipe for a deeper dive into bread science.
The White Pizza Swap
If you aren't a fan of red sauce, swap the marinara for a thin layer of ricotta mixed with lemon zest and black pepper. Use provolone instead of mozzarella for a sharper bite. This version feels a bit more "grown up" and pairs beautifully with a side of roasted broccoli.
Guidelines for Safe Storage and Sustainable Practice
Leftover sliders are a gift to your future self. To store them, wait until they are completely cool to the touch. Placing hot sliders in a container creates steam, which will ruin that crisp crust we worked so hard for. Wrap them tightly in foil or place in an airtight container for up to 3 days in the fridge.
For reheating, please avoid the microwave if you can help it. It turns the bread gummy and the pepperoni chewy. Instead, pop them back into a 350°F (175°C) oven or an air fryer for 5-7 minutes.
This restores the "shatter" to the crust and gets the cheese back to its molten state.
Zero Waste Tip: If you have leftover garlic butter glaze, don't toss it! It's essentially a flavor concentrate. Use it to sauté some spinach the next day or brush it onto a piece of toast for a quick snack.
If you have a few stray pepperoni slices, chop them up and toss them into your morning scrambled eggs for a savory protein boost.
Presentation Strategies for the Family Table
The best way to serve these is right out of the baking dish, but I like to give them one final flourish. A light dusting of fresh parsley and an extra sprinkle of Parmesan right before they hit the table adds a pop of color and a hit of salty "finish" that makes them feel special.
The Ultimate Game Day Spread
If you're serving these for a crowd, create a "dipping station." Even though there's sauce inside, people love to dip. Offer a small bowl of extra warm marinara, some spicy ranch dressing, or even a hot honey drizzle for those who like a "sweet and heat" combination.
A Balanced Family Meal
To turn these into a complete, nutritious dinner, I usually serve them alongside a large, bright green salad with a sharp vinaigrette. The acidity of the dressing cuts through the richness of the butter and cheese perfectly.
Alternatively, a tray of roasted zucchini spears seasoned with the same Italian herbs used in the sliders creates a cohesive and wholesome plate that the whole family will love.
Decision Shortcut If you want maximum crunch, pre toast the rolls for 5 minutes before adding any toppings. If you want maximum cheese pull, use whole milk mozzarella and grate it yourself right before assembly.
If you want a spicier kick, mix a half teaspoon of red pepper flakes into your garlic butter glaze.
Myths Regarding Slider Preparation
Myth: Slicing individual rolls makes them cook better. Actually, keeping the slab intact is the secret to a moist interior. When you slice the rolls as one giant unit, you create a "steam chamber" in the middle that keeps the bread soft while the exterior gets crispy.
If you separate them first, the edges of every single roll dry out and become hard before the cheese even melts.
Myth: You must use expensive "pizza sauce." In reality, a high-quality jarred marinara often has a better flavor profile for sliders than dedicated pizza sauces, which can be overly sweet or thick. Look for a sauce where tomatoes, not sugar, are the first ingredient.
The heat of the oven will reduce the marinara slightly anyway, concentrating its flavor into a perfect pizza style topping.
Recipe FAQs
Is it necessary to use Hawaiian sweet rolls, or can any soft dinner roll work?
No, stick to sweet rolls for the best result. The sugar content in Hawaiian rolls is crucial as it caramelizes under the broiler to create the signature crispy, aromatic crust.
How to prevent the bottom of the sliders from getting soggy?
Pre-bake the bottom slab for 5 minutes before adding toppings. This process dries the bread slightly, creating a hydrophobic barrier against the sauce moisture migration.
What is the optimal cheese for achieving a velvety, stretchy pull?
Use whole milk, low-moisture mozzarella that you grate yourself. Pre-shredded cheeses contain anti caking agents that inhibit the protein strands from fully emulsifying for that perfect stretch.
How to make the garlic butter glaze spreadable without burning the garlic?
Melt butter gently and whisk in minced garlic after removing it from the heat. Use the residual heat to infuse the flavor, ensuring the garlic doesn't scorch and turn bitter during the bake.
Can I assemble the pizza sliders entirely in advance?
Yes, assemble everything except the garlic butter glaze up to 24 hours ahead. Keep the unglazed sliders refrigerated, then brush with the glaze immediately before baking to maintain structural integrity.
How long should the sliders bake if I want the crust extra crunchy?
Bake covered for 15 minutes, then uncover and bake for a final 5 to 8 minutes. If you enjoyed mastering the controlled heat application here, you can apply the same principles to my Homemade 10 Inch Pizza recipe for a crispier dough base.
What should I serve with these sliders to make it a complete dinner?
Serve with a large, highly acidic green salad to cut the richness of the cheese and butter. This balances the meal perfectly, similar to how acidity balances the flavor in my Dreamy Garlic Pizza recipe.
Pizza Sliders Recipe