Red Velvet Cheesecake Bites Recipe
- Time: Active 30 minutes, Passive 1 hour, Total 1 hour 30 mins
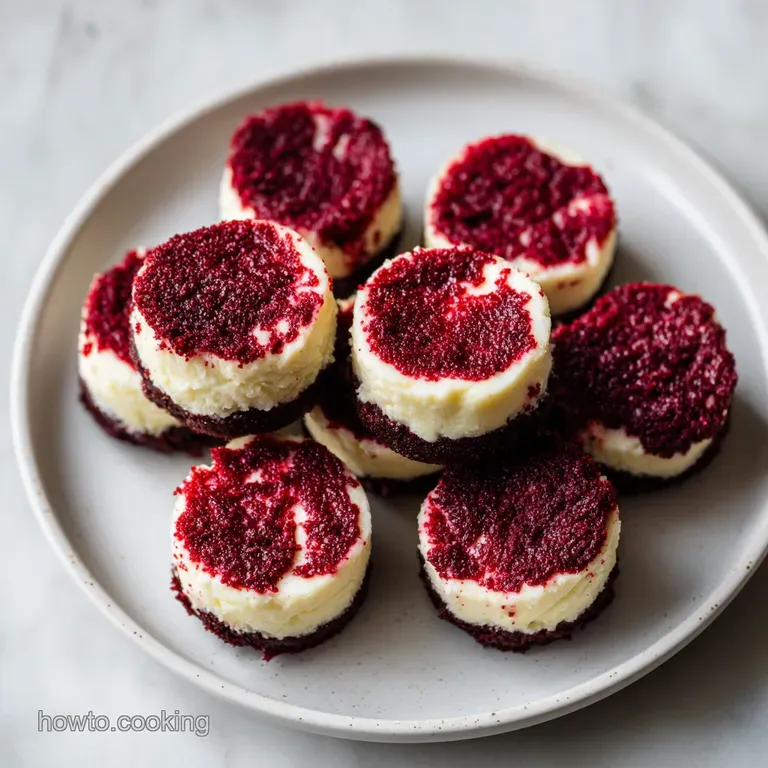
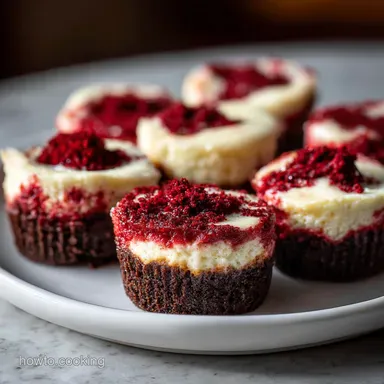
- Flavor/Texture Hook: A velvety, tangy center protected by a white chocolate coating that yields with a satisfying shatter.
- Perfect for: Holiday gift boxes, Valentine's Day parties, or a confident home cook looking for a high impact, minimal tool dessert.
- Mastering Red Velvet Cheesecake Bites
- Success Metrics and Critical Timing
- Ingredient Selection for Wholesome Results
- Essential Tools for Minimal Mess
- Preparing the Perfect Crimson Treat
- Troubleshooting Texture and Coating Flaws
- Clever Swaps for Dietary Needs
- Maintaining Freshness and Best Storage
- Elegant Serving and Plating Ideas
- Recipe FAQs
- 📝 Recipe Card
Mastering Red Velvet Cheesecake Bites
There is a specific sound I wait for every time I make these: the sharp, crystalline snap of the white chocolate shell. Last Christmas, I was rushing to finish a batch while the house was already full of guests.
I had a tray of these chilling, and as I bit into one for a "quality check," the sound was so loud my sister turned around from across the kitchen. That's the hallmark of a successful bite a contrast so stark it catches people off guard.
When I first started experimenting with this recipe, I made the classic mistake of adding too much cream cheese. I ended up with a crimson mush that refused to hold its shape, looking more like a kitchen disaster than a sophisticated dessert.
It took a few tries to realize that the cake isn't just a flavor; it’s the structural foundation. We want just enough binder to create a fudgy texture, not a paste.
The aroma of these is something else sweet, slightly acidic from the cream cheese, and deeply nostalgic. If you have ever felt intimidated by making truffles or complex pastries, this is your entry point.
We use simple tools and reliable steps to turn a basic cake into something that looks like it belongs in a boutique window. Let's get into the details of why this specific ratio works every single time.
Success Metrics and Critical Timing
Before we touch a single crumb, we need to understand the milestones of this dish. Temperature is our most important tool here. If the cake balls are too warm, the chocolate won't set quickly and will pool at the bottom.
If they are too cold like straight from the freezer frozen the chocolate might crack as it contracts. We are aiming for that "cool to the touch" sweet spot.
The Architecture of the Velvet Crumb: The high fat content in the cream cheese coats the starch molecules in the cake crumbs, preventing them from absorbing moisture and turning into a soggy mess. This keeps the center dense and fudgy rather than wet or gummy.
| Thickness | Resting State | Visual Cue | Goal |
|---|---|---|---|
| 1 inch diameter | Chilled 30 mins | Matte surface, firm feel | Structural integrity |
| 1.25 inch diameter | Chilled 45 mins | Solid, no fingerprint indent | Dip ready firmness |
| 1.5 inch diameter | Chilled 60 mins | Heavy, dense sphere | Maximum fudge factor |
We need to be precise with our measurements. If you've enjoyed the process of making a Classic New York Style recipe, you will recognize that same tangy satisfaction here. However, since we aren't dealing with the risk of a cheesecake crack, the confidence level for this recipe is much higher. It is about the assembly and the final finish.
Ingredient Selection for Wholesome Results
Quality matters even in a recipe this simple. When you choose your red velvet cake, make sure it is fully cooled. A warm cake will melt the cream cheese immediately, and you’ll lose that beautiful, distinct crumb texture.
I prefer using a cake that is slightly on the drier side, as it absorbs the binder more predictably.
| Ingredient | Science Role | Pro Secret |
|---|---|---|
| Full fat Cream Cheese | Emulsifying binder | Use brick style, never the whipped tub version for stability. |
| White Chocolate Chips | Protective moisture barrier | Add coconut oil to lower the viscosity for a thinner, crispier shell. |
| Powdered Sugar | Structural sweetener | Cornstarch in the sugar helps absorb excess moisture from the cake. |
For the chocolate coating, the 12 oz of white chocolate chips need a little help to flow smoothly. That's where the coconut oil comes in. It doesn't just add a subtle sheen; it changes the melting point of the chocolate, making it easier to work with. If you are a fan of these flavor profiles, you might also find success with our Decadent Classic Red recipe when you want a more traditional cupcake format.
Essential Tools for Minimal Mess
One of the reasons I love making Red Velvet Cheesecake Bites is that you don't need a stand mixer or a blowtorch. A simple large mixing bowl and a sturdy fork or your clean hands are the best tools for the job.
Hands are actually better because you can feel the consistency of the dough it should feel like slightly damp sand that clumps together when pressed.
You will also need a baking sheet lined with parchment paper or a silicone mat. Never skip this. If you place the dipped bites directly onto a metal tray, the chocolate will bond to the metal, and you'll end up shattering your beautiful shells trying to pry them off.
A small microwave safe bowl for the chocolate and a couple of toothpicks or a dipping tool are all that's left to gather.
Note: If you don't have a dipping tool, a common fork works wonders. Just tap the fork against the side of the bowl to shake off excess chocolate through the tines. This prevents that "foot" of extra chocolate from forming at the base of your bites.
Preparing the Perfect Crimson Treat

Right then, let's get to work. The process is straightforward, but it requires patience during the chilling phases. Do not try to rush the cooling; it's what ensures your bites don't fall apart inside the warm chocolate bath.
- Crumble the 9 oz red velvet cake into a large bowl. Note: Aim for fine crumbs with no large chunks to ensure a smooth interior.
- Combine the 4 oz softened cream cheese, 1/4 cup powdered sugar, and 1/2 tsp pure vanilla extract in a separate small bowl.
- Add the cream cheese mixture to the cake crumbs. Note: Use a folding motion until the mixture is uniform and holds together when squeezed.
- Scoop one tablespoon of the mixture at a time and roll between your palms. until you have 24 smooth spheres.
- Place the spheres on a parchment lined tray and chill in the fridge for 1 hour. until firm and cold to the touch.
- Melt the 12 oz white chocolate chips and 1 tbsp coconut oil in 30 second intervals in the microwave. until glossy and smooth.
- Dip each chilled cake ball into the melted chocolate using a fork. until completely submerged and coated.
- Tap off the excess chocolate gently. Note: This prevents a messy, thick base.
- Place back on the parchment paper and immediately add decorations if using. until the chocolate shell is set and matte.
- Let the bites sit at room temperature for 10 minutes before moving back to the fridge. until fully hardened.
Troubleshooting Texture and Coating Flaws
Even with a simple recipe, things can go sideways. The most common issue I hear about is the "sweaty" chocolate look. This usually happens when the temperature transition is too extreme. If you move the bites from a very cold freezer directly into a hot kitchen, condensation forms on the surface of the chocolate.
Why Your Chocolate Shell Is Cracking
This usually happens because the cake balls were too cold when they were dipped. When the frozen center begins to expand as it warms up, it puts pressure on the rigid chocolate shell, causing it to spiderweb. Always aim for "fridge cold," not "freezer frozen" for the most stable results.
Why the Center Is Too Soft
If your bites feel mushy or won't hold their shape on the fork, the ratio of cake to cream cheese is off. This happens most often when using a very moist, oil based cake. You can fix this by adding more cake crumbs or a tablespoon of almond flour to soak up the excess oil.
| Problem | Root Cause | Solution |
|---|---|---|
| Chocolate is too thick | No thinning agent used | Stir in 1/2 teaspoon more coconut oil to improve flow. |
| Coating is sliding off | Cake balls are too greasy | Blot the rolled spheres with a paper towel before dipping. |
| Chocolate is seizing | Water got into the bowl | Start over; even a drop of water ruins white chocolate. |
Common Mistakes Checklist:
- ✓ Ensure the cake is completely cooled before crumbling (prevents gummy centers).
- ✓ Use full fat brick cream cheese, not the spreadable kind (ensures structural stability).
- ✓ Sift the powdered sugar to remove lumps (creates a velvety mouthfeel).
- ✓ Don't overheat the white chocolate (prevents graininess and burning).
- ✓ Allow excess chocolate to drip off fully before placing on the tray.
Clever Swaps for Dietary Needs
I believe everyone should be able to enjoy a treat, regardless of dietary restrictions. While the original recipe is a classic for a reason, you can make a few smart swaps that preserve the quality while catering to different needs. For instance, if you are looking for a bigger project, you can use the base of our How to Make recipe and just crumble the leftovers.
| Original Ingredient | Substitute | Why It Works |
|---|---|---|
| White Chocolate Chips | Dark Chocolate (60% cocoa) | Less sweet; provides a sophisticated, bitter contrast. |
| Cream Cheese | Vegan Cream Cheese (Almond based) | Similar tang and fat content. Note: May be softer; chill longer. |
| Red Velvet Cake | gluten-free Red Velvet Cake | Starch structure is similar enough for crumbling. |
If you want a different experience altogether, you can try making [Red Velvet Cheesecake Bites] using a "no bake" approach. This involves using crushed chocolate graham crackers mixed with red food coloring and a touch of cocoa powder.
It changes the texture to something more like a cheesecake crust throughout, which is quite interesting.
- If you want a richer flavor, add 1 teaspoon of espresso powder to the cake crumbs.
- If you want a lighter bite, reduce the cream cheese by 1 oz and add 1 oz of Greek yogurt.
- If you want a crunchier texture, fold in 1/4 cup of finely chopped pecans to the mixture.
Maintaining Freshness and Best Storage
Because of the high dairy content in the cream cheese, these cannot stay on the counter for long. I actually think they taste better when they have had 24 hours in the fridge to let the flavors marry. The cocoa in the cake starts to deepen, and the tang of the cream cheese becomes more pronounced.
Storage: Keep your Velvet Cheesecake Bites in an airtight container in the refrigerator for up to 5 days. If you need to stack them, place a sheet of parchment paper between the layers to prevent the shells from sticking to each other or scuffing.
Freezing: These freeze beautifully. You can keep them in a freezer safe bag for up to 3 months. To serve, thaw them in the fridge overnight. Thawing on the counter can lead to the "sweating" issue we discussed earlier.
Zero Waste Tip: If you have leftover cake crumbs that didn't make it into the balls, don't toss them! Toast them in a dry pan for 2 minutes and use them as a "red velvet dust" over vanilla ice cream or as a garnish for your next batch of cupcakes.
Any leftover melted chocolate can be drizzled over fruit or nuts for a quick snack.
Elegant Serving and Plating Ideas
When it comes to serving, these bites are tiny powerhouses of color. The contrast between the stark white shell and the deep crimson interior is the "wow" factor. I like to serve them on a dark slate board or a silver platter to make the white chocolate pop.
For a more casual gathering, you can place each bite in a mini cupcake liner. This makes them easy for guests to grab without getting fingerprints on the glossy chocolate. If you want to lean into the "cheesecake" aspect, you can even top each one with a tiny dollop of extra cream cheese frosting and a single gold leaf flake for a high end look.
One final myth to debunk: many people think you must temper white chocolate to get a snap. While tempering is great for professional chocolatiers, the addition of coconut oil in this recipe creates a "cheat" version of a hard shell. The oil helps the chocolate set firmly without the temperamental temperature gauging.
It’s a reliable shortcut that preserves the quality for a busy home cook. Trust me, once you see your friends' faces when they hear that first "snap," you'll know the effort was worth every minute.

Recipe FAQs
Can I make these ahead of time and freeze the mixture before dipping?
Yes, freezing is recommended for structure. Roll the balls and chill them for at least one hour, or freeze them for up to two weeks before coating. This ensures the center is very cold, which prevents the chocolate shell from absorbing too much heat during dipping.
What is the secret to getting a shiny, hard white chocolate coating?
Add a small amount of coconut oil to the melted chocolate. Adding about one teaspoon of refined coconut oil per 12 ounces of chips lowers the viscosity, allowing the chocolate to flow thinly over the cold cake ball, resulting in a crisp, snappy shell upon setting.
How to tell if the cake and cream cheese mixture is properly combined?
Mix until the dough just holds together firmly when squeezed. The mixture should resemble damp sand that clumps when pressed, not sticky dough or wet paste. If you enjoyed mastering this texture control, see how the same principle of fat-to-dry ratios works in our My GoTo Classic recipe.
Is it true that I must temper white chocolate to prevent cracking?
No, this is a common misconception for this specific application. Because we are dipping a very cold, dense center, the rapid cooling creates a stable set without traditional tempering. Ensure the balls are fridge cold, not rock solid frozen, for the best results.
What happens if I substitute the brick cream cheese with a whipped tub variety?
No, substituting whipped cream cheese will result in a weak center. Whipped varieties contain more air and stabilizers, which drastically increases the moisture content. This leads to a soft, potentially mushy center that won't hold its spherical shape when rolled and dipped.
How long should the finished bites sit before I can handle them?
Allow 10 to 15 minutes at room temperature before chilling completely. This slight warmth prevents condensation from forming when they are moved to the fridge, which causes the chocolate to look sweaty or weep moisture.
What can I do if my finished bites taste too sweet after dipping?
Introduce a contrasting tart element, like lemon zest or espresso powder. A pinch of lemon zest folded into the cake mixture brightens the profile, balancing the sweetness of the white chocolate shell. If you prefer a deeper flavor contrast, try adding espresso powder, similar to the flavor boosters used in our Red Velvet Cake recipe.
Red Velvet Cheesecake Bites
Ingredients:
Instructions:
Nutrition Facts:
| Calories | 142 kcal |
|---|---|
| Protein | 1.5 g |
| Fat | 8.1 g |
| Carbs | 15.8 g |
| Fiber | 0.1 g |
| Sugar | 12.9 g |
| Sodium | 43 mg |
