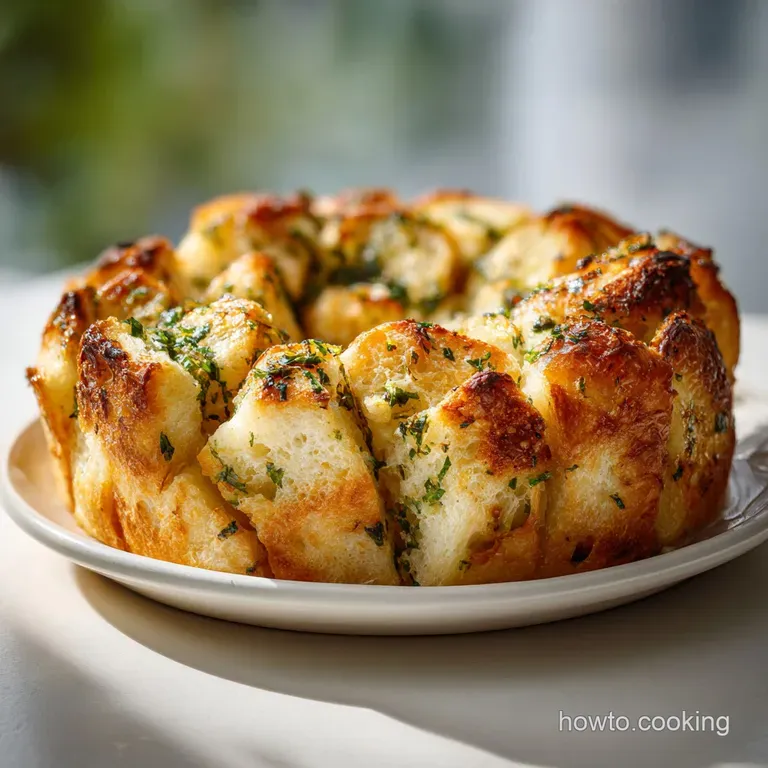
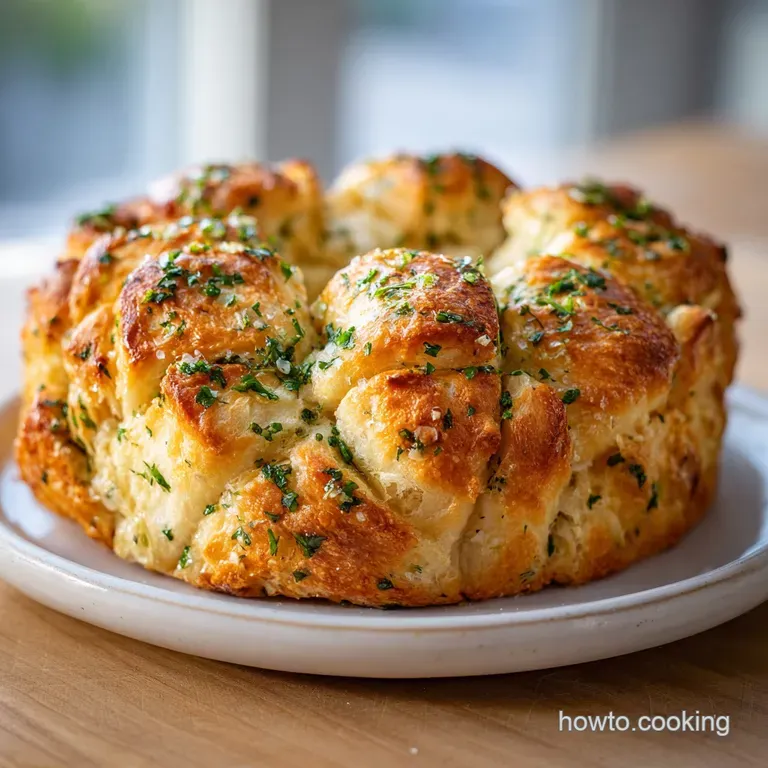
Sourdough Discard Recipe with Garlic and Herbs
- Time: Active 25 mins, Passive 2 hours 30 mins, Total 2 hours 55 mins
- Flavor/Texture Hook: Zesty garlic punch with a silky, pull apart crumb
- Perfect for: Weekend family dinners or hosting friends
- Essential Specs for Savory Sourdough Baking Success
- Wholesome Elements for a Nutrient Dense Savory Bread
- Simple Kitchen Tools for Crafting Professional Loaves
- Foolproof Steps for Infusing Herbs into Sourdough
- Pro Techniques for Avoiding Common Baking Blunders
- Smart Budget Swaps for Custom Flavor Profiles
- Keeping Your Savory Bread Fresh and Nutritious
- Flavorful Pairing Ideas for Your Garlic Herb Bread
- Recipe FAQs
- 📝 Recipe Card
Essential Specs for Savory Sourdough Baking Success
Before we get our hands floury, it is helpful to understand why we are combining these specific elements. In the world of baking, discard is often treated as an afterthought, but in this recipe, it is the star.
When you mix that acidic starter with things like honey and olive oil, you create an environment where the gluten can relax just enough to be tender, but stay strong enough to hold those beautiful garlic layers.
I have spent a lot of time experimenting with ratios, and I’ve found that using 200g of sourdough discard provides the perfect level of savory depth without overpowering the fresh herbs. It’s about building a wholesome foundation that feels substantial. You want a bread that has weight and character, something that can stand up to being dipped in a rich The Nonnas Secret recipe without falling apart instantly.
Utilizing Lactic Acid for Tenderness
The sourdough discard is packed with lactic acid bacteria. These little guys work on the flour proteins during the rise, softening the gluten strands. This is why discard bread often feels more "expensive" or gourmet in the mouth compared to a basic white loaf.
It provides a creamy mouthfeel that is naturally satisfying.
Enhancing Bioavailability through Fermentation
Even though we are using instant yeast for the primary lift, the presence of the discard means the flour has already begun a fermentation process. This helps break down phytic acid, making the nutrients in the bread easier for your body to absorb.
It’s a smart way to bake more nutritious bread for your family while keeping the process manageable.
Engineering the Vertical Pull Apart Crumb
By stacking the dough squares vertically in a loaf pan, we are creating "fault lines." As the bread bakes and the moisture evaporates, these layers pull away from each other slightly. This creates more surface area for the garlic herb oil to seep in, ensuring every bite is saturated with flavor.
| Method | Total Time | Texture | Best For |
|---|---|---|---|
| Discard + Yeast | 2 hours 55 mins | Airy and light | Quick weekend baking |
| Traditional Sourdough | 12-18 hours | Chewy and dense | Advanced flavor depth |
| No Knead Version | 8 hours | Crusty and rustic | Minimal effort prep |
The "Discard + Yeast" method we are using today is the budget smart winner because it saves you half a day of waiting while still delivering that iconic sourdough tang. It is the perfect middle ground for a busy home cook who still wants high-quality, flavorful results.
Wholesome Elements for a Nutrient Dense Savory Bread
Choosing your ingredients is where the confidence in your cooking really begins to show. We aren't just grabbing whatever is on the shelf; we are looking for components that bring both flavor and structural integrity to the table.
For instance, using bread flour instead of all purpose is a non negotiable for me here because that extra protein is what gives you those beautiful, stretchy layers.
| Ingredient | Science Role | Pro Secret |
|---|---|---|
| Sourdough Discard | Flavor & Acidity | Use it cold from the fridge to slow down the initial fermentation slightly |
| Plain Greek Yogurt | Fat & Moisture | The protein in yogurt strengthens the crumb while the fat keeps it silky |
| Bread Flour | Gluten Structure | Provides the "chew" necessary to support the heavy garlic and herb infusion |
If you find yourself missing an ingredient, don't panic. Part of being a smart cook is knowing how to pivot without losing the soul of the dish. I’ve substituted sour cream for yogurt more times than I can count, and the results are honestly just as wholesome and delicious.
It's about maintaining that fat to acid ratio that makes this sourdough discard recipe with garlic and herbs so successful.
You can also experiment with different fats. While extra virgin olive oil gives a classic Mediterranean vibe, using melted butter can make the loaf feel more like a decadent brioche. Just remember that olive oil is a bit better for your heart and keeps the bread feeling lighter.
Utilizing Smart Ingredient Substitutions
| Original Ingredient | Substitute | Why It Works |
|---|---|---|
| Bread Flour (400g) | All Purpose Flour | Results in a softer, less chewy texture; still very tasty |
| Honey (15g) | Maple Syrup | Provides a similar sugar hit for the yeast with a woodsy undertone |
| Fresh Herbs (3 tbsp) | Dried Herbs (1 tbsp) | Concentrated flavor; ensure you crush them in your palm to release oils |
One thing I have learned the hard way: if you are using dried herbs, you really need to use less. They are much more potent than fresh ones, and you don't want your bread tasting like a spice cupboard. Always start with a smaller amount and work your way up.
Trust me on this I once made a loaf that tasted like straight rosemary needles because I didn't adjust the ratio!
Simple Kitchen Tools for Crafting Professional Loaves
You don't need a kitchen full of gadgets to make a world class sourdough discard recipe with garlic and herbs. In fact, some of my favorite loaves have been made with nothing more than a sturdy bowl and a bit of elbow grease.
However, having a few key pieces of equipment will make your life much easier and your results more consistent.
- Kitchen Scale: This is my number one recommendation. Measuring flour by the cup is a recipe for disaster because it’s so easy to pack too much in. Weighing your 400g of flour ensures the hydration is spot on every single time.
- 9x5 Inch Loaf Pan: This provides the necessary walls to force the dough to rise upwards rather than outwards. If you use a pan that’s too large, your pull apart layers will flop over instead of standing tall.
- Small Sauté Pan: You’ll need this to gently warm the garlic and herbs in the olive oil. This step is crucial because it "blooms" the flavors, infusing the oil so that every inch of the bread gets that zesty hit.
Chef's Tip: If you don't have a dough scraper, use a sturdy plastic spatula or even a clean credit card to help fold the dough during the initial mixing phase. It keeps your hands cleaner and helps you incorporate the discard more effectively.
Foolproof Steps for Infusing Herbs into Sourdough
Right then, let's get into the heart of the process. Remember, bread dough is a living thing. It reacts to the temperature of your kitchen and the humidity in the air. If it feels a bit sticky, don't just dump more flour in; try kneading it for another minute first.
Often, the flour just needs a little time to fully hydrate.
Preparing the Dough Base
- Activate the yeast: In a large bowl, whisk together 150ml warm water (not hot!), 15g honey, and 7g instant yeast. Let it sit for about 5 minutes until it looks foamy.
- Combine wet ingredients: Stir in 200g sourdough discard and 60g plain Greek yogurt until the mixture is relatively smooth. It’s okay if there are a few tiny lumps of starter left.
- Add the dry ingredients: Pour in 400g bread flour and 10g sea salt. Use a sturdy spoon to bring it together into a shaggy mass.
- Knead for structure: Turn the dough onto a lightly floured surface and knead for 8 to 10 minutes. You are looking for it to become silky, elastic, and slightly tacky to the touch. Note: This develops the gluten needed for that pull apart texture.
- The first rise: Place the dough in a lightly oiled bowl, cover with a damp cloth, and let it rise in a warm spot for about 1 hour until it has doubled in size and looks airy.
The Garlic Herb Infusion
- Sizzle the aromatics: While the dough rises, mince 6 cloves of garlic. In a small pan over low heat, warm 60ml extra virgin olive oil. Add the garlic and 3 tbsp of finely chopped fresh herbs. Sizzle for just 30 to 60 seconds until the fragrance fills the room but the garlic hasn't browned. Remove from heat immediately.
- Shape the layers: Punch down the risen dough and roll it out into a large rectangle (about 12x18 inches). Spread that glorious garlic herb oil across the entire surface.
- The stack and pack: Cut the dough into roughly 3 inch squares. Stack the squares on top of each other and place them sideways into your greased loaf pan. It will look like a little dough accordion.
- The final proof: Cover the pan and let it rise again for 45 minutes. The dough should be puffy and filling the corners of the pan.
- Bake to perfection: Preheat your oven to 200°C (400°F). Bake for 25 to 30 minutes until the top is a deep mahogany brown and the crust sounds hollow when tapped.
Pro Techniques for Avoiding Common Baking Blunders
Even with the best instructions, things can go sideways. I remember one summer morning when my kitchen was so hot the dough rose in twenty minutes, but it had no flavor because the fermentation happened too fast.
Or the time I forgot the salt honestly, don't even bother eating bread without salt; it tastes like cardboard.
The most common issue with a sourdough discard recipe with garlic and herbs is a dense, gummy interior. This usually happens if the bread is pulled out of the oven too early. Because of the yogurt and discard, this dough is quite hydrated, so it needs that full 30 minutes to set the structure.
If you’re unsure, a digital thermometer is your best friend. The center of the loaf should reach 190°F (88°C).
Precision Checkpoints for Success
- Salt Content: Precisely 10g of sea salt is needed to regulate the yeast and enhance the savory herb notes.
- Discard Weight: Ensure you use exactly 200g of discard; too much can make the dough overly slack.
- Oven Temp: A steady 200°C is required to create the "oven spring" that separates the pull apart layers.
Troubleshooting Your Savory Loaf
| Problem | Root Cause | Solution |
|---|---|---|
| Dough won't rise | Water was too hot | Use lukewarm water (95-105°F) to avoid killing the yeast |
| Garlic tastes bitter | Garlic was burnt | Only sauté until fragrant; it will finish cooking in the oven |
| Layers stuck together | Not enough oil | Be generous with the herb oil between the squares during shaping |
I've also found that if your discard has been sitting in the fridge for more than two weeks, it might be very acidic. If that's the case, you can add a tiny pinch of baking soda to the flour. It helps neutralize the excess acid and ensures a better rise.
It's a little trick I learned after a few "brick like" loaves taught me some humility!
Common Mistakes Checklist
- ✓ Always pat your fresh herbs dry after washing to prevent adding extra moisture to the oil.
- ✓ Don't skip the "sizzle" step for the garlic; raw garlic in bread can be too sharp and won't mellow out as nicely.
- ✓ Ensure your yeast is fresh if it doesn't foam in the water, stop and go buy a new packet.
- ✓ Resist the urge to slice the bread immediately; let it rest for 15 minutes to let the crumb set.
- ✓ Use a serrated knife for the cleanest slices if you aren't just pulling it apart with your hands.
Smart Budget Swaps for Custom Flavor Profiles
One of the reasons I love this sourdough discard recipe with garlic and herbs is how adaptable it is. If you're looking to save a bit of money or just use what you have in the pantry, there are plenty of ways to mix things up. You don't always need the "premium" version to get a high end result.
For instance, if fresh herbs are out of season or too expensive, a good quality "Italian Seasoning" blend works wonders. Just make sure it's salt free so you don't mess up the chemistry of the dough. I also love adding a sprinkle of 30g grated parmesan cheese on top during the last 5 minutes of baking.
It adds a salty, umami crunch that is absolutely worth the extra effort.
Engineering the Everything Bagel Twist
If you want to move away from the herb profile, try using "Everything Bagel" seasoning. Instead of the herb oil mix, use plain olive oil and generously coat each layer with the seeds and dried onion. It's a fantastic variation for a savory breakfast bread.
Boosting the Protein
You can actually replace the water in this recipe with whey (if you make your own yogurt or cheese) or even skim milk. This adds more protein and creates an even softer, more pillowy texture. It’s a great way to make the loaf feel more nutritious and filling.
Mastering the Cheese Pull
If you want those dramatic, stretchy cheese strings, tuck a small slice of mozzarella between every second square of dough during the shaping phase. As it bakes, the cheese melts into the garlic oil, creating a pull apart experience that is hard to beat. If you love this kind of crispy, savory bite, you should also check out my Garlic Bread Crostini recipe for something even quicker!
Keeping Your Savory Bread Fresh and Nutritious
Because this loaf contains yogurt and sourdough discard, it actually stays fresh longer than a standard white bread. The acidity acts as a natural preservative. However, garlic bread is always at its absolute peak about 20 minutes after it comes out of the oven when the crust is still shatter crispy.
- Countertop
- Keep the loaf in a paper bag for up to 2 days. Avoid plastic bags if you want to keep the crust from getting soggy.
- Refrigerator
- Honestly, don't store bread in the fridge. It actually speeds up the staling process through a thing called starch retrogradation.
- Freezer
- This bread freezes beautifully. Slice it first, wrap it tightly in foil, and then place it in a freezer bag. It will stay good for up to 3 months.
Zero Waste Tips: Don't throw away those garlic skins! I keep them in a bag in the freezer with other veggie scraps to make a savory stock later. Also, if you have herb stems left over (especially the woody rosemary ones), toss them into your sauté pan when you're warming the oil, then remove them before spreading the oil on the dough.
It squeezes every last bit of flavor out of your ingredients.
If you happen to have a few stale slices left over, they make the world's best croutons. Just cube them up, toss them with a little extra olive oil, and bake until they are golden and crackling. They are incredible on top of a salad or served alongside a bowl of soup.
Flavorful Pairing Ideas for Your Garlic Herb Bread
This bread is a powerhouse on its own, but it really shines when paired with the right meal. Because it has such a bold garlic and herb profile, it works best with dishes that have a bit of acidity or a rich, creamy sauce to balance things out.
I personally love serving this alongside a big bowl of pasta tossed in a zesty tomato sauce. The pull apart layers are perfect for mopping up every last drop of sauce. It also pairs wonderfully with a hearty Rosemary Chicken Sauce recipe, where the herbs in the bread mirror the flavors in the chicken dish.
The Ultimate Dipping Experience
Instead of just butter, try serving this with a small bowl of high-quality balsamic vinegar and olive oil. Add a pinch of red pepper flakes for a bit of heat. The tang of the sourdough discard in the bread plays off the sweetness of the balsamic beautifully.
The Sunday Roast Companion
If you are doing a full Sunday roast, this bread can actually take the place of Yorkshire puddings or dinner rolls. Its sturdy structure makes it perfect for holding onto gravy. Plus, the garlic notes add a modern twist to a traditional meal.
Mastering the Myths of Discard Baking
- Myth 1: Discard must be "active" to work. Not true! In this recipe, the instant yeast does the heavy lifting for the rise. The discard is there for the flavor, acidity, and texture. Even "dead" discard from the back of the fridge works fine.
- Myth 2: Sourdough discard is hard to digest. Actually, because the starter has already undergone some fermentation, many people find discard based breads much easier on their stomachs than standard commercial bread.
- Myth 3: You can't over knead by hand. While it's hard to do, you can technically over work the dough if you're using a high powered stand mixer. By hand, you'll likely get tired before you ruin the gluten!
Baking this sourdough discard recipe with garlic and herbs is about more than just making food; it's about building confidence in the kitchen and realizing that "waste" is just an opportunity for more flavor.
Every time I pull a loaf out of the oven and see those golden, herb flecked layers, I'm reminded why I love home cooking. It's wholesome, it's smart, and it's absolutely delicious. Enjoy the process!

Recipe FAQs
When to add garlic and herbs to sourdough?
Add garlic and herbs during the final shaping phase. Gently sauté the minced garlic and chopped herbs in olive oil just until fragrant (about 60 seconds) to bloom the flavor, then spread this infused oil evenly over the rolled out dough before cutting and stacking the squares.
Can I put raw garlic in my sourdough?
No, it is highly recommended to sauté the garlic first. Putting raw garlic directly into the dough results in a very sharp, sometimes bitter flavor after baking because it doesn't mellow out sufficiently. A quick sautéing step unlocks a deeper, sweeter aromatic profile.
Which recipe uses the most sourdough discard?
This recipe uses a substantial 200g of sourdough discard. We rely on the discard for its signature tang and to help tenderize the crumb, balancing it with instant yeast for a reliable rise. If you enjoy maximizing discard usage, check out our Sausage Herb Stuffing recipe for another great application.
What ingredients should not be in sourdough bread?
Avoid using tap water that is too hot or omitting salt entirely. Water over 110°F will kill your yeast, and bread without salt tastes bland and lacks structural integrity. Proper salt measurement is key to controlling fermentation.
How to ensure the pull apart layers separate during baking?
Generously spread the infused garlic oil and stack the dough pieces sideways. The oil acts as a barrier preventing the layers from fusing together as the dough proofs and bakes, creating those coveted fault lines for easy separation.
Is it true that frozen berries are a good substitute for fresh in sourdough baking?
No, stick with fresh fruit if you are seeking a clean crumb structure. Frozen berries release excessive moisture, which can inhibit gluten development and potentially lead to gummy pockets in your finished loaf.
Mastering texture control in bread is similar to ensuring a stable emulsion in sauces; precision matters.
How to achieve a silky, tender crumb in a discard loaf?
Incorporate Greek yogurt and avoid overbaking. The fat and protein in the yogurt create a softer mouthfeel, while ensuring the internal temperature reaches only 190°F (88°C) prevents the crumb from drying out. If you mastered the richness here, you’ll love the velvety texture in The Comfort Classic recipe.
Sourdough Discard Garlic Pull Apart

Ingredients:
Instructions:
Nutrition Facts:
| Calories | 252 kcal |
|---|---|
| Protein | 7.5 g |
| Fat | 6.9 g |
| Carbs | 37.1 g |
| Fiber | 1.4 g |
| Sugar | 2.1 g |
| Sodium | 428 mg |
