Jeweltoned Sparklers the Easiest Candied Cranberries Recipe

- Beyond the Bog: Why These Sparkling Cranberries Deserve Center Stage
- Unlocking the Festive Pop: The Secret to Perfect Candied Cranberries
- Assembling Your Five-Star Candied Cranberries Arsenal
- The Detailed Process: Crafting Your Sugared Delights Step-by-Step
- Mastering the Overnight Soak for Optimal Flavor Absorption
- Elevating Your Garnishes: Creative Uses for Homemade Candied Cranberries
- Troubleshooting and Longevity for Your Sugared Harvest
- Recipe FAQs
- 📝 Recipe Card
Beyond the Bog: Why These Sparkling Cranberries Deserve Center Stage
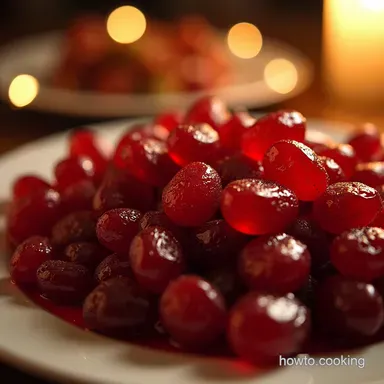
When the weather turns chilly and the air fills with the scent of pine and spice, our culinary focus naturally shifts toward vibrant, celebratory flavors. While cranberry sauce holds a venerable place on the holiday table, there is a far more dazzling presentation waiting to be discovered: Candied Cranberries .
These are not simply fruit they are edible jewels, little spheres encased in a delicate, crystalline shell that offers the perfect textural counterpoint to rich seasonal dishes.
Moving beyond the traditional bog-to-sauce journey, learning how to craft these Sugared Cranberries transforms a simple ingredient into an elegant garnish, a sophisticated snack, or even a thoughtful element in your Christmas Food Gifts .
If you’ve ever admired those perfectly frosted berries on a centerpiece and wondered how they achieve that magical crunch, you’ve arrived at the right place. This definitive guide demystifies the process, ensuring your homemade batch becomes a highlight of your Holiday Snacks repertoire.
Unlocking the Festive Pop: The Secret to Perfect Candied Cranberries
The beauty of this particular treat lies in its deceptive simplicity. It relies on technique rather than complex cooking maneuvers, making it an incredibly accessible way to elevate your festive baking and presentation. We are aiming for a sweet coating that adheres beautifully without becoming soggy or overly thick.
Transforming Tartness into Triumph: A Holiday Essential
The inherent nature of the cranberry its assertive tartness is precisely what makes the Candied Cranberries Recipe so successful. The sugar coating acts as a delightful foil, creating a tension between sour and sweet that keeps you reaching for more.
Unlike baked goods that rely on sugar for structure, here, the sugar serves purely as a decorative and textural enhancement. These Cranberry Treats provide a necessary, bright acidity that cuts through heavier flavors, making them indispensable additions to rich holiday spreads.
The Anatomy of a Perfect Sugar Crust on Your Berries
Achieving that coveted, crackly sugar crust comes down to two critical stages: the application of a binding agent (the warm sugar syrup) and the subsequent drying phase. The syrup slightly adheres to the porous skin of the berry, acting as glue for the final layer of dry granulated sugar.
If the syrup is too thick, the final coat clumps; if it’s too thin, the sugar falls off later. We walk through the precise consistency needed to secure that iconic sparkle.
Why This Recipe Beats the Standard Sauce Every Time
While cranberry sauce is wonderfully comforting, it transforms the fruit into a uniform, soft texture. The goal here is entirely different. We want individual texture, where each bite delivers the initial, satisfying snap of sugar followed immediately by the burst of sharp, fresh cranberry flavor beneath.
This textural contrast is key to their widespread appeal, making them far more versatile than their saucy counterpart for garnishing and snacking.
Assembling Your Five Star Candied Cranberries Arsenal
To create truly show stopping Candied Cranberries , preparation is paramount. While the steps themselves are straightforward, ensuring you have the right materials on hand prevents any mid-process frustration.
For this Easy Candied Cranberries method, the required tools are minimal, but their quality impacts the final look.
Essential Equipment for Achieving Maximum Crystalline Crunch
You won't need specialized candy thermometers or complicated machinery. The core tools involve a medium saucepan for creating the syrup, a whisk for gentle incorporation, and crucially, a large baking sheet lined with parchment paper.
The parchment is non-negotiable; it ensures the berries don't stick as they dry and release residual moisture. We also rely heavily on a slotted spoon or fine mesh sieve for efficiently draining the syrup from the fruit.
Selecting the Brightest, Firmest Cranberries for Success
The quality of your starting material dictates the success of the final product. You must choose fresh cranberries this recipe is not designed for Candied Cranberries From Frozen , as the thawing process releases too much internal moisture, leading to mushy results.
Inspect your bag; you are looking for firm, plump, brightly colored berries free of soft spots or blemishes. If you see any bruised fruit, discard it, as the integrity of the skin is essential for holding the coating.
Choosing Your Soaking Liquid: Bubbles, Citrus, or Simple Syrup?
For this classic preparation, our soaking liquid is a simple, sweet base: granulated sugar dissolved in water. This creates a thin syrup heated just enough to become a perfect vehicle for adherence.
While you can certainly substitute half the water with orange juice or even sparkling water (for a slight textural variation), sticking to the basic 1:2 sugar-to-water ratio ensures the correct viscosity needed for the two-step coating process.
Granulated Gold: The Right Sugar for That Iconic Sparkle
We use standard white granulated sugar for this recipe, and it serves two distinct purposes. First, it’s dissolved into the syrup binder. Second, it forms the final, visible, sparkling exterior.
Resist the urge to use powdered sugar at this final stage, as Candied Cranberries Powdered Sugar tends to dissolve instantly when it hits the moist berry surface. We need the structure of granulated sugar for that satisfying crunch.
Related Recipes Worth Trying
- Sparkling Sugared Cranberries A Festive a holiday garnish — Add some sparkle to your holidays These sugared cranberries are a delightful a holiday garnish perfect for cakes cocktails cheese boards Get the recipe
- Bourbon Brown Sugar Candied Sweet Potatoes - My Go-To! — Level up your candied sweet potato recipes with bourbon & pecan! This Southern classic gets a boozy, crunchy makeover. So easy and utterly delicious!
- Sparkling Sugared Cranberries: The Easiest Festive Treat! — Turn tart cranberries into a dazzling holiday treat with this easy sugared cranberries recipe! Perfect for garnishes or snacks. They're Christmas magic! Get...
The Detailed Process: Crafting Your Sugared Delights step-by-step
The magic happens quickly once the syrup is ready. The goal is to coat the berries, dry them quickly, and then dust them for maximum visual impact. We use approximately 1 cup of granulated sugar for the syrup and reserve another full cup for the final exterior dusting.
First, prepare your fruit. Gently rinse and thoroughly pat dry the 12 oz bag of fresh cranberries. Set aside 1 cup of fresh granulated sugar in a shallow bowl this is for the final, brilliant sparkle. Next, create the syrup: combine 1/2 cup of water with 1 cup of granulated sugar in your saucepan.
Heat over medium heat, stirring occasionally until the sugar is entirely dissolved and the liquid is clear. This process takes about five minutes. Crucially, once it reaches a bare simmer, immediately remove it from the heat.
Allow the syrup to cool for about five minutes this prevents it from cooking the delicate berry skin. Add the dried cranberries directly into this warm syrup and stir gently to ensure every piece is coated. Let them rest in the warmth for about five minutes.
Using a slotted spoon, lift the cranberries out of the syrup, allowing any excess liquid to drip back into the pan for just a moment. Immediately transfer the wet berries onto the prepared, parchment lined baking sheet, spreading them out so they aren't touching.
Mastering the Overnight Soak for Optimal Flavor Absorption
While some recipes rush this step, giving the berries adequate time to dry and set is the true differentiator between amateur and professional looking Candied Cranberries .
Phase One: The Gentle Bath and Draining Protocol
The five minute soak in the warm syrup is designed not just to coat but to slightly plump the berries and create the necessary tackiness. The draining step must be efficient; you want the berries damp, not dripping.
If they are too wet when they hit the dry sugar, the sugar dissolves instantly rather than forming a crust.
The Two-Step Coating Method: Syrup followed by Sugar Dusting
To enhance the final crunch, we employ a two-step coating. After draining from the syrup, gently toss the berries on the tray with about half of your reserved dry sugar. This initial layer creates a rougher surface texture, which is essential for the final, thick dusting.
Spread them back into a single layer on the parchment paper.
Drying and Setting: Achieving That Audibly Satisfying Snap
This is where patience pays off. Place the tray in a cool, dry area of your kitchen. Direct sunlight or high humidity will work against you, potentially causing the sugar to weep. Allow the berries to sit undisturbed for at least one full hour.
You’ll know they are ready when the initial sugar coating appears matte and dry to the touch. Once this base layer is set, it’s time for the grand finale: gently toss the partially dried berries in the remaining dry sugar until they look completely frosted and jewel like.
Shake off any heavy clumps before setting them aside to finish curing completely.
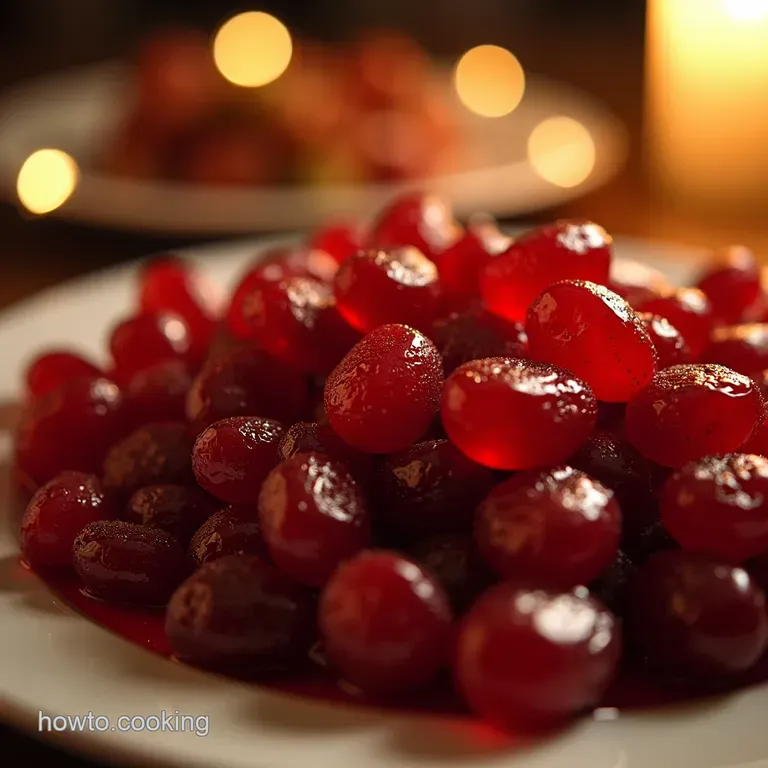
Elevating Your Garnishes: Creative Uses for Homemade Candied Cranberries
Once fully dried, these sparkling treats become miniature flavor bombs ready to elevate almost any presentation. Their tart sweet profile pairs wonderfully with rich, savory items. Consider scattering them generously across a holiday charcuterie board, where their color is stunning against deep reds and whites.
They are also superb when tossed into winter salads alongside goat cheese and pecans, providing a festive crunch. Don't overlook their potential in beverages; a few of these dropped into a prosecco flute or perched on the rim of a festive cocktail instantly transforms it.
Troubleshooting and Longevity for Your Sugared Harvest
Even with the best intentions, sometimes a batch might not dry perfectly, or perhaps you wish to experiment with different flavor profiles. Understanding how to adjust ensures future success.
Flavor Variations: Infusing Your Soak with Spices and Zest
To introduce complex aromas without altering the texture, focus on infusing the syrup. Before removing the syrup from the heat, add aromatics like a strip of orange or lemon zest, or perhaps a few whole star anise pods or a cinnamon stick.
Allow these to steep as the syrup cools slightly before you strain them out prior to dipping the cranberries. For a deeper hue, you can also gently fold in a pinch of ground clove or nutmeg during that final sugar roll.
If you want an even more refined look, consider researching Candied Cranberries In Oven methods, although air-drying typically yields a crisper result.
Storage Secrets: Keeping Your Jewels Crisp for Weeks
Proper storage is essential to maintain that signature crunch. Once you are certain the berries are completely dry and no longer tacky to the touch, transfer them immediately into an airtight container.
Store them at cool room temperature, avoiding any location that might fluctuate wildly in temperature or humidity (like near a steamy dishwasher). Stored correctly, these Candied Cranberries will maintain their crispness and sparkle for up to two weeks, making them excellent for early holiday prep.
Pairing Suggestions: From Cocktails to Charcuterie Boards
The versatility of these sparkling spheres is unmatched. For sophisticated sipping, they are phenomenal floating in a dark liquor cocktail, acting like tiny, edible ornaments. On the food front, they are an essential textural element for any holiday cheese board, pairing particularly well with creamy cheeses like Boursin or sharp blue varieties.
On top of that,, for those who enjoy baking, chopping them finely provides bursts of color and flavor when folded into shortbread cookies or incorporated into the top layer of a lemon loaf cake.
Recipe FAQs
Can I make these Candied Cranberries ahead of time? How long will they keep?
Absolutely, making them ahead is the best way to go, especially if you’re juggling Christmas catering! Store your finished candied cranberries in an airtight container at room temperature, away from direct light.
They should keep beautifully for up to a week, though they are best consumed within 3-4 days for maximum crunch.
My sugar coating looks patchy or wet what went wrong with the drying process?
That usually means two things: either your initial simple syrup was too thin, or the environment is too humid typical of a British winter, isn't it? Ensure the berries are spread in a single layer with space around them, and if it’s damp, try placing them on a wire rack rather than directly on the counter to encourage airflow underneath.
Can I use frozen cranberries instead of fresh ones for this recipe?
Unfortunately, I’d strongly advise against using frozen cranberries here. When frozen berries thaw, they release a lot of water, which will ruin the thin sugar syrup and result in a sticky, weeping mess rather than a crisp coating.
Stick to fresh, plump berries for the best results, just like selecting the perfect mince pie filling!
I want these for cocktails can I add a flavour twist to the Candied Cranberries?
Definitely! A brilliant trick is to add zest to the sugar syrup while it’s heating orange or lemon zest works wonders. Alternatively, you can mix a pinch of finely ground spices like cinnamon or cardamom directly into the final dry sugar coating for an extra festive aroma.
My syrup cooled down too fast and the sugar started to crystallize before I dipped the fruit. Now what?
Don't panic; this happens when the sugar ratio gets a bit too high! You can gently reheat the syrup over very low heat, stirring constantly until it liquefies again. Make sure you don't let it boil, though, or you'll end up with hard toffee chunks instead of a coating!
Sparkling Candied Cranberries