Brown Gravy Recipe: Velvety and Savory

- Time: 5 min active + 10 min cooking = Total 15 minutes
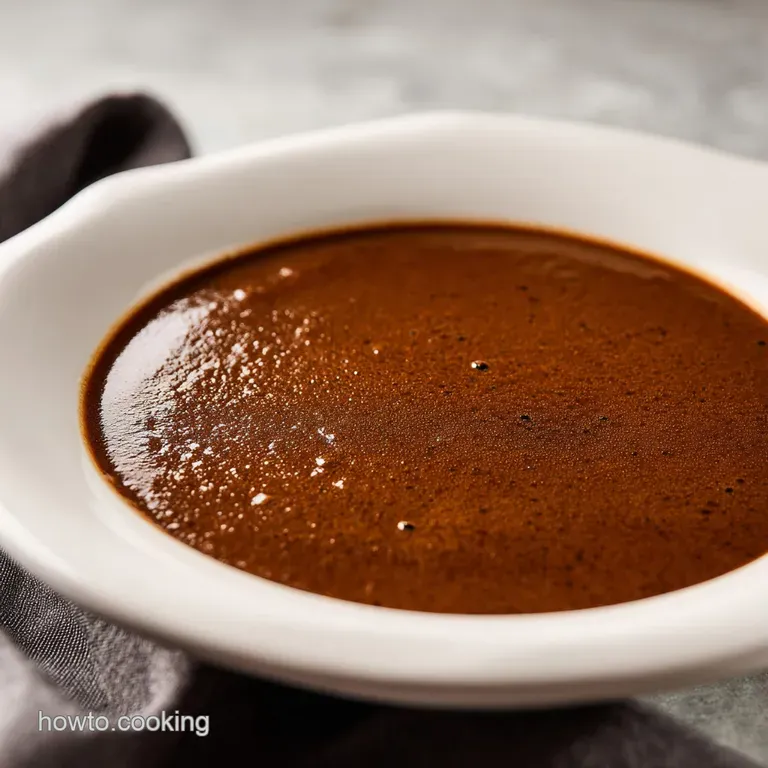
- Flavor/Texture Hook: Glossy, velvety, and intensely savory
- Perfect for: Sunday roasts, mashed potatoes, or quick weeknight comfort meals
- Easy Homemade Brown Gravy Recipe
- The Secret to Better Gravy
- Quick Details and Timing
- Ingredient Breakdown and Roles
- Tools You Actually Need
- Step by Step Cooking Guide
- Fixing Common Gravy Mistakes
- Troubleshooting Common Issues
- Customizing Your Gravy
- Storage and Reheating Tips
- Best Ways to Serve
- Recipe FAQs
- 📝 Recipe Card
Easy Homemade Brown Gravy Recipe
The sizzle of butter hitting a hot pan is where it all begins. For me, the smell of browning flour always brings back memories of my grandma's kitchen on a rainy Sunday afternoon. There was something about that thick, mahogany sauce pouring over a mountain of potatoes that just felt like a hug in food form.
In many American households, this is more than just a condiment, it is the glue that holds the entire holiday meal together.
I used to think you needed a fancy stock pot and hours of simmering bones to get this right. But honestly, you don't. Once you understand how a simple roux works, you can whip up a batch that tastes like it spent all day on the stove. It's all about the patience you show in those first few minutes of cooking the flour.
This brown gravy recipe is designed for the home cook who wants that high end taste without the stress. Whether you are serving it with a heavy feast or just some frozen peas and mash, it delivers that deep, savory punch every single time. It's a foolproof way to add a bit of luxury to your plate.
The Secret to Better Gravy
The real trick is in the color. Most people rush the flour and butter, but if you let it actually brown, you get a complex, nutty depth that you just can't get from a packet. This is what separates a bland white sauce from a rich brown gravy. I've found that pairing this with some Thanksgiving Stuffing makes for the ultimate comfort platter.
But what about the lumps? That is the biggest fear for most of us. The secret is the "paste phase." By adding a tiny bit of liquid first and whisking it into a thick paste, you break down the flour clumps before the rest of the liquid goes in.
It's a simple move, but it's the difference between a silky sauce and a lumpy mess.
Also, don't ignore the acid. A tiny splash of Worcestershire sauce adds a fermented, salty depth that mimics the flavor of long simmered beef bones. It provides that "umami" hit that makes your taste buds wake up. Trust me, skipping it makes the sauce feel flat.
What Actually Makes It Thick
Starch Gelatinization: When flour is heated with liquid, the starch granules swell and burst, creating a network that traps liquid.
The Roux Bond: Coating flour in fat prevents the starch from clumping, ensuring a velvety finish. According to the experts at Serious Eats, the longer you cook the roux, the less thickening power it has, but the more flavor it develops.
| Method | Time | Texture | Best For |
|---|---|---|---|
| Stovetop | 15 mins | Glossy & Silky | Quick meals, daily use |
| Oven/Roaster | 30 mins | Hearty & Deep | Large roasts, holiday meals |
Component Analysis
| Ingredient | Science Role | Pro Secret |
|---|---|---|
| Unsalted Butter | Fat medium | Use a high fat European butter for a richer mouthfeel |
| All Purpose Flour | Thickening agent | Whisk constantly to avoid "hot spots" and burning |
| Beef Broth | Flavor base | Use low sodium so you can control the salt yourself |
| Worcestershire | Umami booster | Add at the end to keep the bright, tangy notes |
Quick Details and Timing
When you're in the middle of a meal, every minute counts. This recipe is streamlined to fit into a tight window without sacrificing quality. You aren't spending an hour reducing a stock, but you are giving the roux enough time to develop.
Precision Checkpoints:
- Roux Color: Aim for the color of peanut butter or a light caramel.
- Roux Timing: Exactly 3-5 minutes of whisking before adding liquid.
- Final Consistency: The sauce should be thick enough to coat the back of a spoon without running off immediately.
Right then, let's look at what you'll need to get this on the table. It's a short list, but the quality of these few items really matters.
Ingredient Breakdown and Roles
For this brown gravy recipe, you want ingredients that play well together. I prefer unsalted butter so I can dial in the salt at the end based on how salty the beef broth is.
- 4 tbsp unsalted butter Why this? Provides the fat needed for the roux and a rich finish (Substitute: Ghee for a nuttier taste)
- 1/4 cup all purpose flour Why this? The primary thickener for the sauce (Substitute: Cornstarch, but you'll need a slurry method)
- 2 cups beef broth Why this? The savory liquid base (Substitute: Mushroom broth for vegetarians)
- 1/2 tsp onion powder Why this? Adds a subtle, savory background note (Substitute: 1 tbsp finely minced shallots)
- 1/4 tsp black pepper Why this? Adds a tiny bit of heat and aromatics (Substitute: White pepper for a cleaner look)
- 1/2 tsp salt Why this? Enhances all other flavors (Substitute: Soy sauce for extra color and salt)
- 1 tsp Worcestershire sauce Why this? Essential for that deep, meaty umami (Substitute: A drop of fish sauce or soy sauce)
Tools You Actually Need
You don't need a kitchen full of gadgets for this. In fact, keeping it simple is better. All you really need is a small saucepan and a good whisk.
A whisk is non negotiable here. A fork or a spoon just won't cut it when you're trying to integrate the flour into the butter. You need those wires to break up the starch molecules and keep the sauce velvety.
If you have a silicone spatula, keep it handy for scraping the corners of the pan. The roux tends to hide in the edges and burn if you don't keep it moving. A simple 2 quart saucepan is perfect for this volume of liquid.
Step by step Cooking Guide
Let's crack on with the actual cooking. Just remember to keep your heat at a steady medium, and don't walk away from the pan.
- Melt the butter in a small saucepan over medium heat until it is bubbling and frothy. Note: Don't let it brown too quickly or it will burn
- Whisk in the flour and continue whisking for 3-5 minutes until the roux reaches a light golden brown color and emits a nutty aroma.
- Reduce heat slightly and pour in 1/4 cup of beef broth, whisking vigorously until it forms a thick, smooth paste.
- Gradually pour in the remaining beef broth in a steady stream, whisking constantly until no lumps remain and the liquid is integrated.
- Stir in the onion powder, black pepper, salt, and Worcestershire sauce.
- Increase heat to medium low and simmer for 3-5 minutes until the gravy is glossy and thick enough to coat the back of a spoon.
Chef's Note: If you want a deeper mahogany color, let the roux cook for an extra minute before adding the broth. Just be careful, as it can go from "brown" to "burnt" in about ten seconds.
Fixing Common Gravy Mistakes
Even the best of us have had a batch of gravy go wrong. Usually, it's just a matter of temperature or timing. If your brown gravy recipe turns out a bit off, don't panic.
Troubleshooting Common Issues
| Issue | Solution | |||||||
|---|---|---|---|---|---|---|---|---|
| Why Your Gravy is Lumpy | This usually happens if the broth is ice cold and poured in too quickly. The fat in the roux seizes, trapping pockets of dry flour. | |||||||
| Why Your Gravy is Too Thin | You likely didn't cook the roux long enough, or you didn't let the final sauce simmer. The starch needs heat to fully activate and thicken the liquid. | |||||||
| Why Your Gravy is Too Thick | Over reduction is the culprit here. If you simmer it for too long, the water evaporates, leaving you with a paste instead of a sauce. | Problem | Root Cause | Solution | --------- | ------------ | - |
Customizing Your Gravy
Sometimes you don't have all the ingredients, or you want a different vibe. This brown gravy recipe is very flexible.
If you want X, do Y:
- Want it richer? Whisk in a cold knob of butter right before serving.
- Want it darker? Add a teaspoon of soy sauce or a pinch of cocoa powder.
- Want it thinner? Add an extra splash of broth.
For those who don't eat meat, a vegetarian brown gravy recipe is surprisingly easy. Just swap the beef broth for a rich mushroom broth and use soy sauce instead of Worcestershire. The mushrooms provide that same earthy depth.
If you're avoiding gluten, replace the flour with a cornstarch slurry (mix cornstarch with cold water first). Just be aware that the texture will be more "gel like" and less velvety than the flour version.
Storage and Reheating Tips
If you have leftovers, don't throw them out. This sauce keeps remarkably well. Store it in an airtight container in the fridge for up to 3-4 days.
When you reheat it, you'll notice it has thickened into a jelly. That's normal. Put it in a small pot over medium heat and whisk in a teaspoon of water or broth to loosen it back up. Avoid the microwave if you can, as it tends to create hot spots that can break the emulsion.
For long term storage, you can freeze this brown gravy recipe for up to 2 months. Just thaw it in the fridge overnight before reheating on the stove.
Zero Waste Tip: If you have a tiny bit of gravy left in the pan, don't wash it away. Use it as a base for a quick pan sauce for sautéed mushrooms or toss it with some leftover roast beef for a quick sandwich.
Best Ways to Serve
This sauce is a powerhouse of flavor, so it pairs best with neutral, starchy sides. It's the gold standard for mashed potatoes, but don't stop there.
I love pouring this over a slice of toasted sourdough or using it as a topping for a savory meatloaf. This velvety sauce is the ideal partner for Ruth's Chris Gratin Potatoes, providing a savory contrast to the creamy cheese.
You can also use it for poutine. Just fry up some thick cut potato wedges, pile on some cheese curds, and smother everything in this hot brown gravy recipe. It's a total crowd pleaser for game nights or rainy weekends.
Right then, you've got everything you need. Just remember: be patient with your roux, whisk like your life depends on it, and don't be afraid to add that extra splash of Worcestershire. Happy cooking!
Recipe FAQs
What is the 3 2 1 rule for gravy?
It is a ratio of 3 parts liquid, 2 parts fat, and 1 part flour. This general guideline helps cooks maintain consistent thickness across different batches of sauce.
What is brown gravy made of?
It consists of a browned roux and beef broth. Butter and flour are cooked until golden, then simmered with beef broth, Worcestershire sauce, onion powder, salt, and black pepper.
Can a diabetic eat gravy?
Yes, but in moderation. The flour and butter contribute carbohydrates and fats that may impact blood sugar levels, so portion control is key.
What can I use if I don't have brown gravy mix?
Whisk together butter, flour, and beef broth. This homemade method provides a fresher flavor and better texture than processed packets. If you enjoyed mastering this roux technique, see how the same principle works in our potato soup.
How to fix lumpy gravy?
Whisk vigorously over medium heat. If the lumps remain, pour the sauce through a fine mesh strainer to achieve a perfectly smooth consistency.
How to store and reheat brown gravy?
Keep it in an airtight container in the fridge for 3-4 days. Reheat in a small pot over medium heat, whisking in a teaspoon of water or broth to loosen the sauce.
Is it true you must use a cornstarch slurry to thicken gravy?
No, this is a common misconception. A roux made from butter and flour creates a richer, nuttier flavor and a more stable emulsion than cornstarch.
Brown Gravy Recipe

