Easy Dinner Rolls Recipe Fluffy: Honey Enriched
- Time: Active 15 minutes, Passive 1 hours 20 mins, Total 1 hours 35 mins
- Flavor/Texture Hook: Buttery, honey kissed, and incredibly velvety
- Perfect for: Holiday gatherings, Sunday family dinners, or beginner bakers
- Master This easy dinner rolls recipe fluffy
- Why Families Love These Rolls
- Selecting High Quality Ingredients
- Necessary Tools for Baking Success
- Steps for Perfect Bread Results
- Solving Common Dough Problems
- Adjusting the Batch Size
- Debunking Bread Making Myths
- Storing and Preserving Freshness
- Best Dishes to Serve Alongside
- Recipe FAQs
- 📝 Recipe Card
Master This easy dinner rolls recipe fluffy
The scent of yeast blooming in warm milk is the ultimate kitchen perfume. I remember the first time I tried to make bread for a big family dinner. I was so nervous that I over kneaded the dough until it felt like a workout ball. The result?
We basically served edible hockey pucks that required a gallon of gravy just to swallow. It was embarrassing, but it taught me that bread isn't about muscle, it's about patience and moisture.
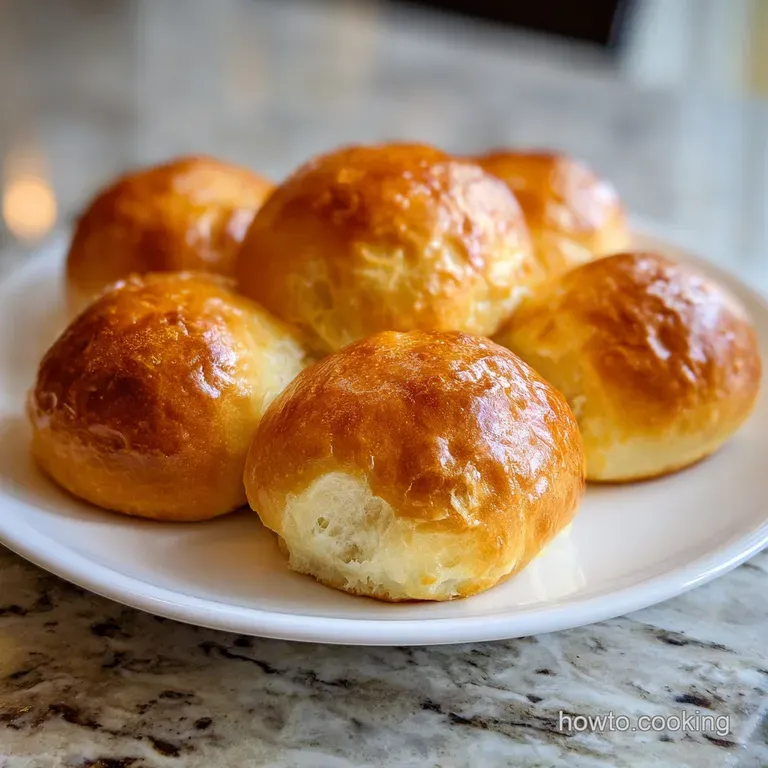
Now, when I pull these rolls out of the oven, the "shatter" of the golden top crust followed by the steam escaping from a velvety interior is pure magic. We don't do dry, crumbly rolls in this house anymore.
This easy dinner rolls recipe fluffy is designed to give you that cloud like texture every single time, even if you've never touched a bag of flour in your life. Trust me on this, once you see your family tearing into these while they're still steaming, you'll never go back to the store-bought stuff.
We are going for a specific kind of soft here. Not the kind that falls apart, but the kind that bounces back when you press it. It's the ultimate vehicle for soaking up soup or just holding a thick slab of salted butter. Let's get into the details so you can bake with total confidence.
Why Families Love These Rolls
The Physics of the Rise
CO2 Trapping: The honey provides immediate fuel for the yeast, creating rapid carbon dioxide bubbles that are trapped by the gluten network. This creates the signature "lift" and airy internal structure.
Enrichment Stability: Adding fat through butter and egg coats the flour proteins, slowing down gluten development just enough to ensure the crumb is tender rather than chewy.
Thermal Caramelization: The natural sugars in the honey and milk undergo the Maillard reaction at a lower temperature, giving you a deep golden crust without overcooking the center.
| Method | Time | Texture | Best For |
|---|---|---|---|
| Standard Oven | 20 minutes | Crisp crust, airy center | Traditional dinner rolls |
| Cast Iron Stovetop | 25 minutes | Ultra crispy bottom, dense top | Rustic, campfire style |
| Air Fryer | 12 minutes | Very crunchy exterior | Small batches (4-6 rolls) |
Choosing the right method depends on your kitchen setup, but for that classic holiday look, the oven is your best friend. The consistent dry heat allows the rolls to expand upward, creating those beautiful pull apart edges.
If you find yourself in a pinch for space, the stovetop method in a heavy skillet works, though you'll need to flip them halfway to ensure the tops get cooked through.
The beauty of this dough is its resilience. It's a "forgiving" dough, meaning if your kitchen is a bit chilly or you accidentally add a tablespoon too much flour, the rolls will still be delicious. But to get them truly spectacular, we need to look at what's happening under the hood of our ingredients.
Selecting high-quality Ingredients
| Component | Science Role | Pro Secret |
|---|---|---|
| Whole Milk | Hydration and Fat | Use 105-115°F milk to wake yeast without killing it. |
| Active Dry Yeast | Leavening Agent | Store in the freezer to keep it potent for months. |
| Honey | Hygroscopic Sweetener | Honey attracts moisture, keeping the rolls soft for 3 days. |
| All Purpose Flour | Structural Base | Sift your flour to avoid "flour pockets" in the dough. |
Understanding these parts helps you bake with intuition. For instance, if you're looking for a different flavor profile, you might want to try a Garlic Butter Bread Rolls recipe which uses a similar enrichment technique but leans into savory aromatics. The milk provides the liquid needed to turn flour into dough, but the fats in the milk also help create a "short" crumb, which is just a fancy way of saying "easy to bite through."
Component Analysis
Choosing the right flour is vital. While bread flour has more protein, all purpose flour keeps these rolls light and prevents them from becoming too "bready" or tough. We want pillows, not sandwich loaves.
Ingredient List and Substitutes
- 1 cup warm whole milk (105-115°F): Substitute with 1 cup warm water + 1 tbsp milk powder. Why this? Milk proteins soften the crumb significantly.
- 1/4 cup honey: Substitute with 1/4 cup maple syrup. Why this? Sugars feed the yeast and brown the crust.
- 2.25 tsp active dry yeast: Substitute with 2 tsp instant yeast (skip the blooming step). Why this? Provides the essential lift.
- 1/3 cup unsalted butter, melted and cooled: Substitute with 1/3 cup neutral oil. Why this? Fat creates a velvety, non dry texture.
- 1 large egg, room temperature: Substitute with 1/4 cup plain yogurt. Why this? Egg provides structure and a rich golden color.
- 1 tsp fine sea salt: Substitute with 1.5 tsp kosher salt. Why this? Salt controls yeast growth and enhances flavor.
- 4 cups all purpose flour: Substitute with 4 cups bread flour (rolls will be chewier). Why this? Builds the necessary gluten skeleton.
- 2 tbsp unsalted butter, melted for glazing: Substitute with olive oil. Why this? Adds a final punch of flavor and shine.
- 1 pinch flaky sea salt: Substitute with any coarse salt. Why this? Provides a sensory "pop" on the first bite.
Necessary Tools for Baking Success
You don't need a high tech kitchen to make this easy dinner rolls recipe fluffy, but a few specific tools make the process much smoother. A kitchen scale is my number one recommendation. Measuring flour by the cup is notoriously inaccurate because of how much you "pack" the cup.
One person's cup might be 120 grams, while another's is 150 grams. That 30 gram difference is enough to turn a soft roll into a brick.
Chef Tip: If you don't have a stand mixer, don't sweat it. You can do this by hand! Just use a sturdy wooden spoon for the initial mixing, then use your hands. It'll take about 10 minutes of kneading to reach that smooth, elastic stage, but it's a great way to feel the dough's progress.
If you are a fan of sweet treats, you'll find that the tools used here are almost identical to what you'd use for a Homemade Cinnamon Rolls Recipe. Both require a good mixing bowl and a warm spot for proofing. For the best results, use a 9x13 inch baking pan. Metal pans conduct heat more evenly than glass, which helps the bottoms of the rolls get that perfect golden tan.
Steps for Perfect Bread Results

1. Activate the Yeast Bloom
Whisk 1 cup warm whole milk (105-115°F) with 1/4 cup honey in a small bowl. Sprinkle 2.25 tsp active dry yeast on top and let it sit for 5-10 minutes until it looks frothy and smells like a brewery.
Note: If it doesn't foam, your yeast is dead start over.
2. Mix the Enriched Dough
In your stand mixer bowl, combine the yeast mixture with 1/3 cup melted butter, 1 large egg, and 1 tsp fine sea salt. Add 4 cups all purpose flour one cup at a time, mixing with the dough hook on low speed until the dough pulls away from the sides.
3. The Bulk Proof
Transfer the dough to a lightly oiled bowl and cover it with a damp cloth. Place it in a warm, draft free spot for about 60 minutes until it has doubled in size. Note: A cold oven with the light turned on is a perfect proofing box.
4. Shape into Pillows
Gently punch the dough down to release air. Divide it into 15 equal pieces (about 65g each). Roll each piece into a smooth ball by tensioning the dough against the counter until the surface is taut and shiny.
5. The Second Rise
Place the balls in a greased 9x13 inch pan. Cover and let them rise for another 30 minutes until they are puffy and touching each other.
6. The Golden Bake
Preheat your oven to 350°F (180°C). Bake the rolls for 18-20 minutes until the tops are deep golden and sound hollow when tapped.
7. The Finishing Touch
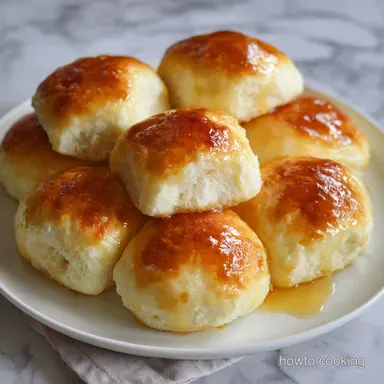
Brush the tops immediately with 2 tbsp melted butter and sprinkle with a pinch of flaky sea salt. Let them rest in the pan for 5 minutes until the butter is fully absorbed.
8. Serving the Rolls
Transfer to a basket lined with a cloth to keep them warm. Serve immediately while the center is still steaming and the crust is at its most tender.
Solving Common Dough Problems
Dense and Heavy Rolls
If your rolls feel more like paperweights than pillows, the most common culprit is too much flour. It's tempting to keep adding flour when the dough feels sticky, but resist! Stickiness is actually a sign of good hydration. Another cause is under proofing.
If the dough hasn't doubled in size before going into the oven, it won't have enough air pockets to be light.
Dough Did Not Rise
This is heartbreaking but fixable. Usually, it means your milk was too hot (killing the yeast) or too cold (leaving the yeast dormant). It could also mean your yeast is expired. Always check the "bloom" in step one.
If there's no foam after 10 minutes, don't proceed with the rest of the ingredients because they won't save the bread.
| Problem | Root Cause | Solution |
|---|---|---|
| Rolls are dry/crumbly | Overbaking | Remove from oven when internal temp hits 190°F. |
| Tops are too dark | Sugar caramelizing too fast | Tent the pan with foil after 12 minutes of baking. |
| Dough is too sticky to shape | High humidity or large egg | Flour your hands, not the dough, or chill dough for 20 mins. |
Common Mistakes Checklist
- ✓ Never use milk hotter than 120°F (it kills the yeast instantly).
- ✓ Don't skip the second rise; this is where the "fluff" actually happens.
- ✓ Measure flour by weight if possible to avoid a dry, dense crumb.
- ✓ Avoid over kneading; stop as soon as the dough is smooth and elastic.
- ✓ Keep the dough covered during proofing to prevent a dry "skin" from forming.
Adjusting the Batch Size
Downscaling (Making 7-8 rolls): Cut all ingredients in half. For the egg, whisk one large egg in a small bowl and use exactly half of it (about 2 tablespoons). Use an 8x8 inch square pan for the second rise and bake.
You might need to reduce the baking time by 3-5 minutes, so start checking them at the 15 minute mark.
Upscaling (Making 30 rolls): Double all ingredients. When doubling yeast and salt, I actually recommend using only 1.75x the amount (about 4 tsp yeast and 1.75 tsp salt) to prevent the dough from rising too fast and tasting overly "yeasty." Work in two separate batches for the kneading if your mixer is small, and use two 9x13 pans.
For the most accurate results when doubling, keep your liquids at exactly double, but add the flour gradually. Sometimes the larger mass of dough retains more moisture and requires a tiny bit less flour than a strict 2x calculation would suggest.
| Premium | Budget | Flavor Impact | Savings |
|---|---|---|---|
| Grass fed Butter | Store brand Butter | Slightly less "rich" but still soft | Save $3-4 |
| Manuka Honey | Granulated Sugar | Loses floral notes; crust is crunchier | Save $5-8 |
| Organic Whole Milk | 2% Milk or Water | Less velvety mouthfeel | Save $1-2 |
Debunking Bread Making Myths
One major myth is that you must knead dough for exactly 10 minutes. In reality, kneading is done when the dough passes the "windowpane test" meaning you can stretch a small piece of dough thin enough to see light through it without it tearing.
Depending on your strength or mixer speed, this could take 5 minutes or 12. Trust the dough, not the clock.
Another misconception is that yeast is extremely fragile. While you shouldn't boil it, yeast is actually quite hearty. If your milk is a little too cool, the rise will just take longer it won't ruin the recipe. Patience is often the best "ingredient" you can add to any bread recipe.
Storing and Preserving Freshness
Storage: These rolls stay fresh at room temperature in an airtight bag for up to 3 days. If you want to keep them longer, put them in the fridge for up to a week, but be sure to reheat them as the fridge can dry out the starches.
Freezing: You can freeze these! Bake them fully, let them cool completely, then wrap them in foil and place in a freezer bag. They stay good for 3 months. To reheat, bake the frozen rolls (wrapped in foil) at 300°F for 10-15 minutes.
Zero Waste: Never throw away stale rolls. They make the best croutons you've ever had. Just cube them, toss with olive oil and herbs, and bake until crunchy. They also work perfectly for a decadent bread pudding because the honey and butter already provide a rich flavor base.
Best Dishes to Serve Alongside
These rolls are the ultimate companion for hearty, saucy meals. I love serving them with a slow cooked pot roast where they can soak up all the flavorful juices. They are also the "golden child" of the Thanksgiving table, sitting right next to the turkey and cranberry sauce.
If you are looking for a lighter pairing, they go beautifully with a fresh salad or a seafood dish like a PanSeared Mediterranean Cod recipe. The sweetness of the honey in the rolls balances the acidity of a tomato based sauce perfectly. Honestly, sometimes I just eat two of them warm with a spread of honey butter and call it a snack. There is no wrong way to enjoy a fresh, fluffy roll.

Recipe FAQs
What is the ideal milk temperature for activating the yeast?
Use milk between 105°F and 115°F. This warm range activates the yeast rapidly without killing it, ensuring a quick and robust rise for fluffy results.
How do I ensure my rolls are fluffy and not dense?
Under proof the dough slightly and use room temperature butter. Sticky dough is better than dry dough; too much flour leads to density, so resist adding extra unless absolutely necessary.
Can I substitute the honey with another sweetener in this recipe?
Yes, maple syrup is a direct 1:1 substitute for honey. Honey is used because its hygroscopic nature helps keep the rolls moist for several days, similar to how we balance moisture in our Homemade Pie Crust Recipe.
How do I stop the tops from browning too quickly in the oven?
Tent the pan with aluminum foil after the first 12 minutes of baking. The sugars in the honey promote fast browning, so covering them shields the top while the center finishes cooking to a safe internal temperature.
Is it true that I must use a stand mixer to properly knead this dough?
No, a stand mixer is not required for good results. You can achieve the necessary elasticity by hand kneading on a floured surface for about 10 minutes; feel for smoothness rather than strictly timing the process.
What is the best way to store the leftover rolls to maintain softness?
Store them airtight at room temperature for up to 3 days. For longer storage, freeze them completely wrapped, or repurpose stale ones into excellent homemade croutons to avoid waste.
What main dishes pair well with these sweet, buttery dinner rolls?
Serve them with saucy, savory meals to balance the sweetness. They are perfect for soaking up gravy or stew juices, or they pair nicely alongside crisp appetizers like our Garlic Bread Crostini recipe.
Fluffy Dinner Rolls Recipe
Ingredients:
Instructions:
Nutrition Facts:
| Calories | 198 kcal |
|---|---|
| Protein | 4.6 g |
| Fat | 6.9 g |
| Carbs | 29.1 g |
| Fiber | 0.9 g |
| Sugar | 3.8 g |
| Sodium | 167 mg |
