Baked Red Velvet Donuts Recipe
- Time: Active 10 minutes, Passive 12 minutes, Total 22 minutes
- Flavor/Texture Hook: Velvety crumb with a tangy cream cheese shatter
- Perfect for: Festive brunch, Valentine's Day, or a confident weekend bake
- Essential Baking Techniques Explained
- Precise Recipe Specifications
- Essential Ingredients and Substitutions
- Required Baking Equipment
- Detailed Baking Process Steps
- Solving Common Baking Mistakes
- Creative Recipe Variations
- Smart Storage and Preservation
- Common Baking Myths Debunked
- Elegant Presentation and Pairings
- Recipe FAQs
- 📝 Recipe Card
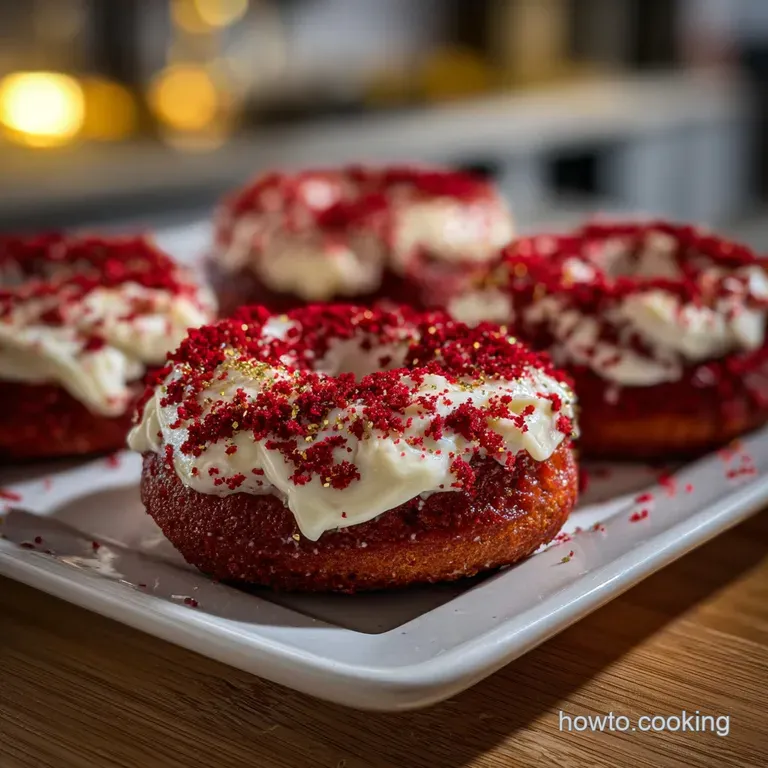
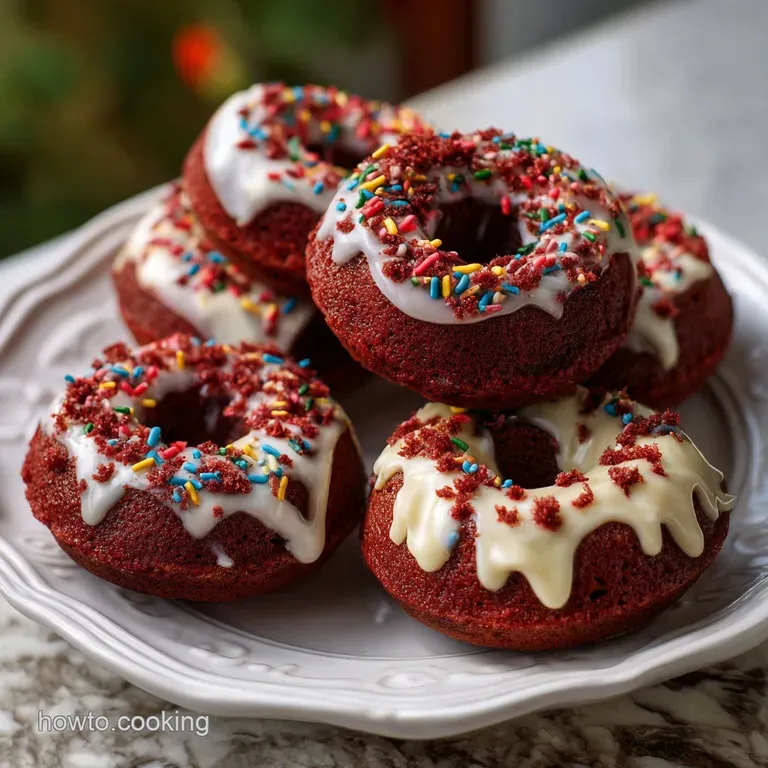
The kitchen should be a place where we create memories through flavorful, wholesome food that brings the family together. There is something truly special about the first time you pull a tray of these Red Velvet Donuts out of the oven, seeing that iconic deep crimson hue peeking through a snowy layer of cream cheese glaze.
I remember the first time I made these for a neighborhood brunch, I was so worried about them being dry, but the secret lies in the balance of acidity and moisture.
We often think of donuts as a complicated, messy affair involving bubbling vats of oil, but this baked version is much more approachable for the home cook. It’s about building confidence in the kitchen by mastering simple techniques that yield professional results.
You don't need to be a pastry chef to achieve that signature "velvet" texture; you just need to understand how your ingredients interact.
If you have ever felt intimidated by the thought of making donuts from scratch, let this be the recipe that changes your mind. We are going to use smart, economical pantry staples to create something that looks and tastes like it came from a high end boutique.
Right then, let's get our aprons on and talk about the fascinating science that makes these treats so incredibly soft.
Essential Baking Techniques Explained
Understanding the "why" behind our actions helps us become more intuitive cooks. When we talk about Red Velvet Donuts, we are really talking about a delicate dance of chemistry between acids and bases.
It isn't just about the color; it is about the structural integrity and the unique mouthfeel that sets this flavor profile apart from a standard chocolate or vanilla treat.
- Acidic Leavening
- The distilled white vinegar and buttermilk react instantly with the baking soda, creating a surge of carbon dioxide that ensures a light, airy rise.
- Protein Softening
- The acid in the buttermilk breaks down the gluten strands in the all purpose flour, which is exactly how we achieve that velvety, tender crumb.
- Cocoa Interaction
- Unsweetened Dutch process cocoa powder provides a subtle earthy base that complements the tang of the cream cheese without overpowering the sweetness.
- Emulsification
- Room temperature eggs bind the fats and liquids together, creating a smooth batter that won't separate or become oily during the bake.
Chef's Tip: To get the most vibrant color with the least amount of dye, I always mix my red food coloring into the liquid ingredients (buttermilk and eggs) first. This ensures the pigment is evenly distributed throughout the batter before it hits the flour, preventing those annoying red streaks.
If you find yourself enjoying the process of working with these flavors, you might also want to see how this technique translates to a larger scale with my How to Make recipe for a classic cake. Both recipes rely on that same beautiful acidic balance to keep the crumb moist and flavorful.
Why Use Buttermilk and Vinegar?
The combination of buttermilk and distilled white vinegar might seem redundant, but they serve two distinct purposes. The buttermilk provides the bulk of the moisture and a creamy tang, while the vinegar acts as a concentrated acidic "boost" for the baking soda.
This ensures that the donuts rise rapidly in the first five minutes of baking, which is crucial for preventing them from becoming dense.
What Does "Blooming" Cocoa Do?
While we aren't using boiling water here, mixing your unsweetened Dutch process cocoa powder with the melted butter and warm room temperature liquids helps "bloom" the flavor. This releases the aromatic compounds trapped within the cocoa solids.
It’s a small step that significantly deepens the chocolate notes in your Red Velvet Donuts.
Precise Recipe Specifications
Before we start mixing, it is vital to have our numbers straight. Success in baking often comes down to the details of timing and temperature. I always suggest using a digital scale for your 250g of all purpose flour to ensure consistency, but if you're using cups, make sure to use the "spoon and level" method.
| Feature | Fast Method (Baked) | Classic Method (Fried) | Outcome Comparison |
|---|---|---|---|
| Preparation Time | 10 minutes | 2 hours | Baked is much faster for busy mornings |
| Fat Content | Lower fat | Higher fat | Baked is lighter; Fried is richer |
| Texture | Cake like, velvety | Airy, yeasty | Baked mimics a dense, moist cake |
Component Analysis Table
| Component | Science Role | Pro Secret |
|---|---|---|
| Buttermilk | Tenderizes gluten | Use full fat for the richest mouthfeel |
| Baking Soda | Chemical leavener | Sift with flour to avoid "soapy" pockets |
| Dutch process Cocoa | Adds depth/color | Sift to remove lumps that ruin the crumb |
| Cream Cheese | Fat based tang | Must be completely soft for a silky glaze |
Essential Ingredients and Substitutions
Creating something nutritious and wholesome for your family means choosing the best possible versions of your ingredients. I prefer using King Arthur All Purpose Flour for its consistent protein content and Guittard Dutch process cocoa powder for its dark, rich finish.
Here is what you will need for your Red Velvet Donuts.
For the Red Velvet Base
- 2 cups (250g) All purpose flour: The structural foundation.
- 3 tbsp (22g) Unsweetened Dutch process cocoa powder: For that hint of chocolate flavor. Why this? Dutch process is less acidic and darker than natural cocoa.
- 1 tsp Baking soda: Our primary lifting agent.
- 1/2 tsp Salt: Enhances all the other flavors.
- 3/4 cup (150g) Granulated sugar: Provides sweetness and moisture retention.
- 3/4 cup (180ml) Buttermilk, room temperature: The secret to the "velvet" texture.
- 2 Large eggs: Provides structure and richness.
- 1/4 cup (56g) Unsalted butter, melted: Adds flavor and a soft crumb.
- 1 tbsp Red food coloring: For that iconic, vibrant appearance.
- 1 tsp Distilled white vinegar: Reacts with the soda for extra lift.
- 1 tsp Vanilla extract: Rounds out the chocolate and tang.
For the Cream Cheese Glaze
- 4 oz (115g) Full fat cream cheese, softened: The tangy base of our topping.
- 1/4 cup (56g) Unsalted butter, softened: Adds shine and stability to the glaze.
- 1 1/2 cups (180g) Powdered sugar, sifted: Sweetens without adding graininess.
- 1 tsp Vanilla extract: Provides a classic aromatic finish.
- 2 tbsp Whole milk: Adjusts the consistency for a perfect "drip."
Ingredient Substitution Table
| Original Ingredient | Substitute | Why It Works |
|---|---|---|
| Buttermilk (3/4 cup) | Milk (3/4 cup) + 2 tsp Lemon juice | Mimics the acidity needed for the rise. |
| Dutch process Cocoa | Natural Cocoa Powder | Works fine, but the color will be lighter. |
| Unsalted Butter | Melted Coconut Oil | Same fat ratio but adds a subtle nutty note. |
| All purpose Flour | 1:1 gluten-free Blend | Provides a similar structure; may be slightly grittier. |
Required Baking Equipment
You don't need a kitchen full of gadgets, but a few specific tools will make this process much smoother. I personally love using my Wilton Non Stick Donut Pans because they release the batter so cleanly.
- Two 6 cavity donut pans: Essential for the shape.
- Large mixing bowl: For the dry ingredients.
- Medium mixing bowl: For whisking the wet ingredients.
- Whisk and silicone spatula: To ensure a streak free batter.
- Piping bag or Ziploc bag: This is my favorite "pro" trick for getting the batter into the pans without a mess.
- Wire cooling rack: Critical for preventing soggy bottoms.
- Small whisk: For making a lump free cream cheese glaze.
Detailed Baking Process Steps
Now, let's get into the heart of the kitchen. Follow these steps carefully, paying attention to the sensory cues like the smell of the cocoa and the look of the batter.
- Preheat your oven to 350°F (175°C). Grease your donut pans thoroughly with non stick spray or a bit of melted butter. Note: This ensures the donuts shatter slightly at the edges rather than sticking.
- Whisk the dry ingredients. In your large bowl, combine the 250g flour, cocoa powder, baking soda, salt, and sugar. Sift them if you see any lumps in the cocoa.
- Mix the wet ingredients. In the other bowl, whisk the buttermilk, eggs, melted butter, red food coloring, vinegar, and vanilla until the color is uniform and vibrant.
- Combine gently. Pour the wet ingredients into the dry. Use your spatula to fold them together until just combined. Note: Over mixing will make your donuts tough instead of velvety.
- Transfer to the bag. Snip the corner off a large Ziploc bag and fill it with the batter. This gives you much more control than using a spoon.
- Pipe the rings. Fill each donut cavity about 3/4 full. Bake 10 to 12 minutes until the tops spring back when lightly touched.
- Cool in the pan. Let the donuts sit for 5 minutes before flipping them onto the wire rack. Note: This allows the structure to set so they don't break.
- Make the glaze. While they cool, beat the softened cream cheese and butter together until silky. Slowly add the powdered sugar, vanilla, and milk.
- Dip the donuts. Once completely cool, dip the top of each donut into the glaze. Let the excess drip off before placing it back on the rack.
- Set the glaze. Allow the glaze to firm up for about 15 minutes before serving for that professional, "shatter" finish.
If you enjoy the rhythm of making donuts but want something with a bit more crunch and spice, you should definitely try my Fluffy Yeast Cinnamon recipe. It’s a great way to practice your dough handling skills!
Solving Common Baking Mistakes
Even with the best intentions, things can go sideways in the kitchen. Don't worry, it happens to the best of us! The key is knowing how to fix it next time.
Why Your Donuts Stuck to the Pan
This is usually caused by two things: either the pan wasn't greased well enough, or the donuts were removed while they were still too hot. The sugar in the batter is like glue when it's hot. Give them that 5 minute "rest" in the pan; it's the most important time for the outer crust to firm up.
Why Is My Glaze Transparent?
If your glaze looks more like a syrup than a thick frosting, your donuts might still be too warm, or you added too much milk. Always wait until the donuts are cool to the touch. If the glaze is already thin, just whisk in another 1/4 cup of powdered sugar to stiffen it up.
Quick Fix Table
| Problem | Cause | Fix |
|---|---|---|
| Dry, crumbly donuts | Over baking | Reduce bake time by 2 minutes next time. |
| No red color | Not enough dye | Ensure you use a full tablespoon of liquid or a teaspoon of gel. |
| Tough texture | Over mixing | Fold the batter only until the flour disappears. |
Creative Recipe Variations
Once you have mastered the basic Red Velvet Donuts, you can start getting creative. The kitchen is your laboratory, and these variations are a great way to show off your growing confidence.
- The "Black Forest" Twist: Add a half cup of finely chopped dried cherries to the batter and top the glaze with a drizzle of melted dark chocolate.
- Nutty Crunch: Sprinkle toasted pecans or walnuts over the glaze while it's still wet for a wholesome textural contrast.
- Heart Shaped Treats: If you don't have a donut pan, you can bake these in a heart shaped muffin tin for a festive Valentine's Day surprise.
Chef's Tip: For a deeper chocolate flavor without changing the chemistry, add a half teaspoon of espresso powder to your dry ingredients. It won't make them taste like coffee, but it will make the cocoa taste much more intense.
Smart Storage and Preservation
To keep your Red Velvet Donuts tasting as fresh as the moment they came out of the oven, you need a plan. Because of the cream cheese glaze, these require a bit more care than a standard sugar dusted donut.
- Fridge: Store in a single layer in an airtight container for up to 3 days. The cool temperature keeps the cream cheese safe and the crumb moist.
- Freezer: You can freeze the unglazed donuts for up to 2 months. Wrap them individually in plastic wrap and then place them in a freezer bag. To serve, thaw at room temperature and glaze fresh.
- Zero Waste Tip: If you have leftover glaze, don't throw it away! It makes a delicious spread for morning toast or a dip for apple slices. If you have "failed" donuts that broke apart, crumble them up and layer them with leftover glaze in a glass to make "Red Velvet Parfaits."
Common Baking Myths Debunked
There are a lot of old wives' tales in the baking world that can lead you astray. Let's clear some of those up so you can bake with clarity.
- Myth: "You must use beetroot for authentic red velvet." Truth: While original recipes used the reaction between cocoa and acid to create a reddish tint, modern cocoa is processed differently. To get that iconic bright red, food coloring is the standard and most reliable method for home cooks.
- Myth: "Baked donuts are just muffins in a different shape." Truth: While the batter is similar, a true donut recipe like this one has a higher fat and sugar ratio to ensure the edges "fry" slightly against the pan, giving it a distinct texture that a muffin lacks.
Elegant Presentation and Pairings
Presentation is the final step in creating a wholesome, flavorful experience for your family. A beautiful plate can make even a simple Tuesday morning feel like a celebration.
The "Better Than Dining Out" Presentation: Place your glazed donuts on a white marble slab or a rustic wooden board. Dust the tops with a tiny bit of extra cocoa powder or even some finely crumbled "donut scraps" for a professional bakery look.
- Coffee
- A light roast with citrus notes perfectly cuts through the richness of the cream cheese.
- Tea
- An Earl Grey or a spicy Chai provides a lovely aromatic backdrop to the chocolate notes.
- Milk
- For the kids, a cold glass of whole milk is the classic, wholesome choice that never fails.
Baking should be a joyful, empowering experience. With these Red Velvet Donuts, you are not just making a dessert; you are mastering the art of the perfect crumb and the silkiness of a great glaze. Trust your instincts, watch your timers, and most importantly, enjoy every single bite! For more morning inspiration, don't forget to check out my My Go To Doughnut Recipe for those days when you're craving a traditional glazed finish.

Recipe FAQs
how to make red velvet donuts?
Yes, bake them. The process involves creating a cake like batter using buttermilk, cocoa powder, and red food coloring, which is then piped into greased donut pans and baked at 350°F for about 10 to 12 minutes.
how to make red velvet donut holes?
Yes, simply pipe batter into mini muffin tins or mini donut pans. Use the same batter, but you must reduce the baking time significantly, usually to 6 to 8 minutes, to prevent them from drying out.
how to make red velvet cake donuts?
The provided recipe is already for cake donuts. Cake donuts rely on chemical leaveners like baking soda and baking powder, resulting in a dense, moist, velvety crumb, unlike yeasted donuts which are airy.
how to make red velvet?
Focus on the acid and color balance. The defining characteristic comes from the reaction between buttermilk and baking soda, which tenderizes the crumb, traditionally enhanced by cocoa and red dye.
what is red velvet donut?
It is a baked or fried cake donut flavored with cocoa and dyed deep red. They are usually topped with a signature tangy cream cheese glaze that balances the subtle sweetness.
Can I substitute the buttermilk for a standard milk?
No, you should substitute it carefully for best results. Buttermilk provides necessary acid to react with the baking soda and tenderize the gluten; substitute it with whole milk mixed with one teaspoon of white vinegar or lemon juice per cup.
What is the best way to pipe the batter?
Using a piping bag gives the cleanest result. Fill a large Ziploc bag with the batter, snip one corner off, and pipe directly into the greased donut cavities until they are about 3/4 full.
Red Velvet Donuts Recipe

Ingredients:
Instructions:
Nutrition Facts:
| Calories | 304 calories |
|---|---|
| Protein | 4.1g |
| Fat | 12.1g |
| Carbs | 45.2g |
| Fiber | 1.1g |
| Sugar | 28.5g |
| Sodium | 235mg |
