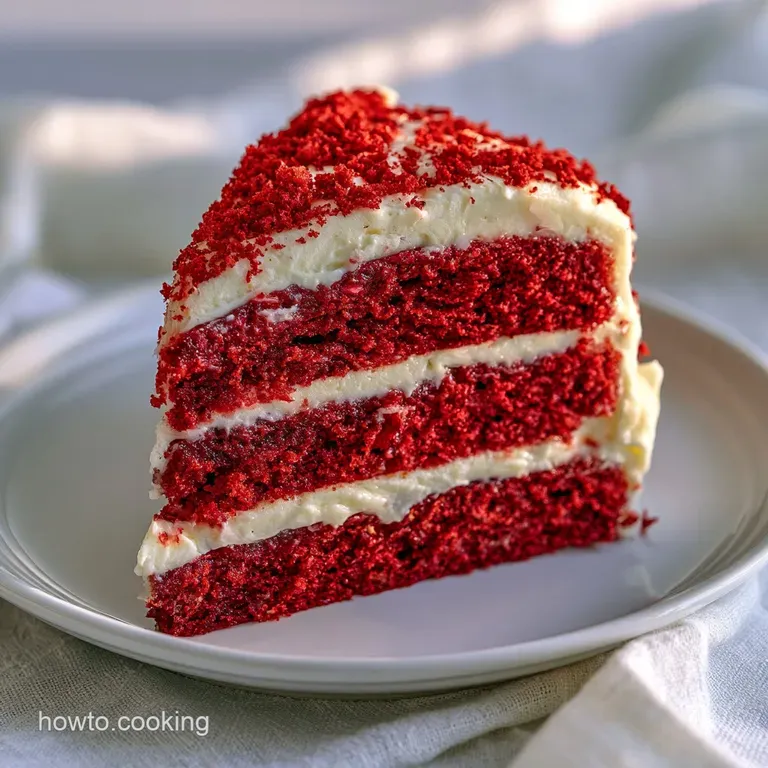
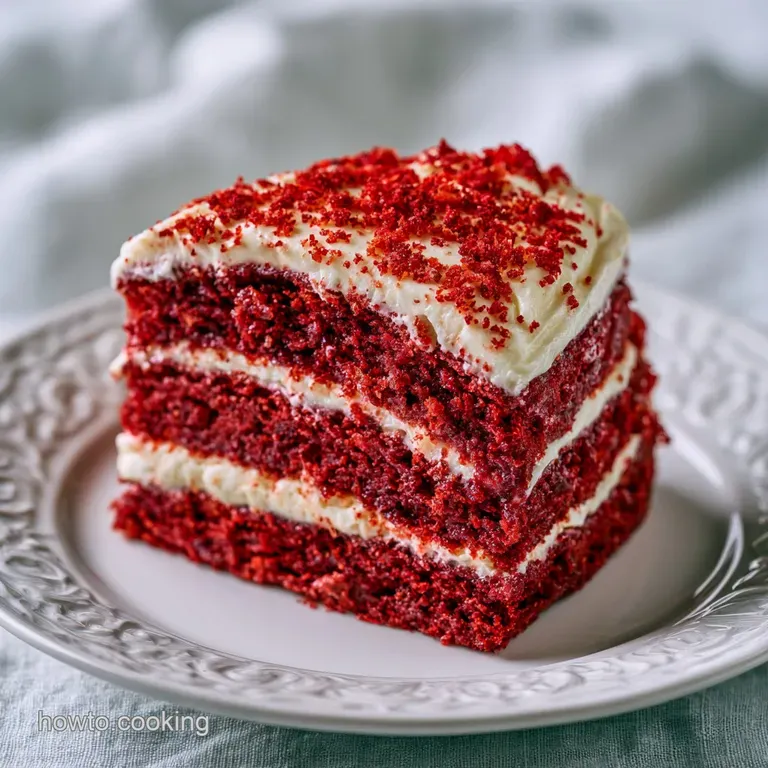
Red Velvet Dream Cake: Moist and Velvety
- Time:20 minutes active + 2 hours chilling = Total 2 hours 50 mins
- Flavor/Texture Hook: Tangy cream cheese paired with a velvety, moist cocoa crumb
- Perfect for: Birthday celebrations or a cozy family Sunday treat
The Red Velvet Dream Cake
That first smell hits you before the oven timer even goes off - a sharp, tangy scent of cocoa and vinegar that somehow transforms into something sweet and comforting. I remember the first time I tried making this in my grandmother's kitchen.
She told me that in the old South, this wasn't just a dessert; it was a status symbol. Back when ingredients were scarce, the deep red color was a way of showing you had a little extra to spend on the fancy stuff.
We've all had those store-bought versions that taste like nothing but sugar and red dye. This isn't that. This red velvet dream cake is all about the balance between the slight bitterness of the cocoa and the zing of the buttermilk.
It's a cake that feels nostalgic but tastes fresh, with layers that actually hold their shape without being dry.
Trust me on this, the magic is in the texture. You want it to feel like actual velvet on your tongue, not a spongy bread or a dense brownie. We're going for a specific, fine grained crumb that just melts away. Let's get into how to actually make this happen without breaking the bank.
Why This Texture Works
Acid Interaction: The combination of buttermilk and distilled white vinegar reacts with the baking soda to create tiny bubbles, making the cake light.
Fat Distribution: Using vegetable oil instead of butter ensures the cake stays moist and velvety even after it's been chilled in the fridge.
Cocoa Balance: A small amount of cocoa powder provides a hint of chocolate flavor without overpowering the red color or the tang.
Protein Softening: The acidity helps break down the gluten in the all purpose flour, preventing the cake from becoming chewy or tough.
| Method | Time | Texture | Best For |
|---|---|---|---|
| Oven Baked | 30 minutes | Classic, airy crumb | Traditional layers |
| Stovetop Steam | 45 minutes | Denser, fudgy feel | Small batches/No oven |
Right then, if you're looking for something even smaller, you might like my red velvet cupcakes which use a similar flavor profile but bake much faster.
Ingredient Roles Explained
Understanding what each part does helps when you're trying to save a batch or swap things out on a budget. This isn't just a list; it's a system.
| Ingredient | Science Role | Pro Secret |
|---|---|---|
| Buttermilk | Tenderizer | Adds the essential tang and softens the flour |
| Vegetable Oil | Moisture Agent | Keeps the cake soft at cold temperatures |
| Red Gel Color | Visual Impact | Gel is more concentrated than liquid, so the cake stays moist |
| Distilled Vinegar | Leavening Boost | Triggers the baking soda for a better rise |
When you're choosing your ingredients, don't be tempted to use low-fat cream cheese for the frosting. It doesn't hold the same structure, and you'll end up with a soupy mess that slides right off your red velvet dream cake. Stick to the full fat version for that stable, silky finish.
Essential Baking Tools
You don't need a professional kitchen, but a few specific tools make this much easier. For the mixing, a large bowl and a sturdy whisk are your best friends. I usually use a stand mixer such as KitchenAid for the frosting, but a hand mixer works just fine as long as you're patient with the butter.
The pans are where people usually mess up. Use two 8 inch round cake pans. I strongly suggest lining the bottoms with parchment paper. Don't just grease them - the parchment is your insurance policy. There's nothing worse than a red velvet dream cake that sticks to the pan and rips in half during the flip.
For the sifting, a fine mesh strainer is a must. You can't risk cocoa powder clumps in a cake that's supposed to be velvety. If you don't have one, you can whisk the dry ingredients very vigorously, but sifting is the way to go for a professional result.
From Prep to Plate
Let's crack on with the actual baking. Follow these steps closely, and keep an eye on those sensory cues.
Phase 1: Aerating the Batter
- Sift together the 2.5 cups all purpose flour, 2 tbsp unsweetened cocoa powder, 1 tsp baking soda, and 1 tsp salt in a medium bowl. Note: This removes clumps and ensures the leavening is evenly spread.
- In a separate large bowl, whisk together 1.5 cups vegetable oil and 1.5 cups granulated sugar until combined.
- Beat in 2 large eggs, adding them one at a time. Note: This creates a stable emulsion for the fat and liquid.
- Stir in 1 cup buttermilk, 1 tsp distilled white vinegar, 1 tsp vanilla extract, and 2 tbsp red gel food coloring.
Phase 2: The Precision Bake
- Gradually fold the sifted dry ingredients into the wet mixture using a spatula. Stop the moment you see a consistent mahogany red batter. Note: Overmixing creates gluten, which makes the cake tough.
- Divide the batter evenly between two greased and parchment lined 8 inch round cake pans.
- Bake at 350°F (175°C) for 30 minutes until a toothpick inserted in the center comes out with a few moist crumbs.
- Cool cakes in the pans for 10 minutes, then transfer to a wire rack to cool completely.
Phase 3: The Cooling and Assembly
- Prepare frosting by whipping 16 oz full fat cream cheese and 0.5 cup unsalted butter until pale and fluffy.
- Slowly add 4 cups powdered sugar, 1 tsp vanilla extract, and 0.125 tsp salt.
- Assemble by frosting one cake layer, topping with the second layer, and enrobing the entire cake in the remaining frosting.
- Chill the cake for 2 hours to ensure frosting stability before serving.
Chef's Note: If you're in a rush to cool the cakes, don't put them in the freezer. The sudden temperature drop can cause the center to collapse. Stick to the wire rack.
Avoiding Kitchen Disasters
Even the best of us mess up. Usually, it's a matter of temperature or timing. If your cake feels too dense, it's likely because the batter was overmixed or the oven wasn't preheated.
Troubleshooting Common Issues
| Issue | Solution | ||||
|---|---|---|---|---|---|
| Why Your Cake Sinks in the Middle | This usually happens because the oven door was opened too early, letting out the heat, or you used too much baking soda. If the structure hasn't set, the air bubbles collapse. | ||||
| Why Your Frosting is Too Runny | This is almost always due to the cream cheese being too soft or the kitchen being too warm. The butter and cheese should be softened, not melted. | ||||
| Why the Color is Dull | If you use too much cocoa powder, it will brown the red. Stick to the 2 tbsp limit to keep that vibrant hue.
Flavor Variations to TryWhile the classic red velvet dream cake is a winner, you can tweak it to fit the occasion. If you're making this for a birthday, try adding a layer of fresh raspberries between the cake layers. The tartness of the berries cuts through the richness of the cream cheese frosting. For a lighter profile, you can replace the vegetable oil with melted coconut oil. According to Serious Eats, the type of fat used significantly impacts the perceived moisture and flavor of a crumb. Coconut oil adds a very subtle nuttiness that pairs well with the cocoa. If you want something even more decadent, try a chocolate swirl version. Take a small portion of the red batter, mix in an extra tablespoon of cocoa, and swirl it into the main cake using a knife. For those who love a different kind of dream cake, my vanilla bean dream cake is a great alternative if you need something less bold. For a dairy-free SwapYou can use a soy based buttermilk alternative and vegan cream cheese. Note that vegan butter often has a lower melting point, so you'll need to chill the cake for an extra hour to ensure the frosting stays put. For a gluten-free VersionSubstitute the all purpose flour with a high-quality 1:1 gluten-free baking blend. Since gluten-free flours absorb more liquid, you might need to add an extra tablespoon of buttermilk to keep the batter from becoming too thick. Scaling Your BakeAdjusting a recipe isn't as simple as doubling everything, especially with baking chemistry. Going Smaller (Half Batch) Use two 6 inch pans instead of 8 inch. Reduce the baking time by about 20%, starting your check at 20 minutes. For the eggs, beat one egg in a bowl and use exactly half of it by weight. Going Bigger (Double Batch) If you're making a massive red velvet dream cake for a party, don't double the baking soda or salt - increase them by only 1.5x to avoid a metallic taste. Lower your oven temperature to 325°F (160°C) and extend the bake time by 10-15 minutes to ensure the larger volume cooks through without burning the edges. Work in batches if your mixer is small. Overcrowding a bowl leads to uneven mixing, which means some parts of your cake will be denser than others. Storage and Zero WasteOnce your red velvet dream cake is assembled and chilled, keep it in an airtight container in the fridge. It stays fresh for about 5 days. Because of the cream cheese frosting, this cake must be refrigerated. Freezing Guidelines You can freeze the cake layers without frosting for up to 3 months. Wrap them tightly in plastic wrap and then a layer of foil. When you're ready to bake, thaw them in the fridge overnight before frosting. I don't recommend freezing the fully frosted cake, as the frosting can develop a grainy texture. Zero Waste Tips If you have leftover cake scraps from leveling the tops, don't throw them away! Crumble them up and mix them with a bit of the leftover frosting to make cake pops. Alternatively, you can layer the crumbs in a glass with whipped cream and berries for a quick red velvet trifle. If you have a small amount of buttermilk left over, use it as a tenderizer for fried chicken or add it to your next batch of pancakes for extra fluffiness. Best Way to ServeThe presentation is half the fun. Since this is a red velvet dream cake, the contrast is everything. I like to save a few crumbs from the leveling process and sprinkle them on top of the white frosting for a professional look. Slice the cake while it's cold. Use a hot knife - dip it in boiling water and wipe it dry between every single cut. This ensures you get those sharp, clean lines that show off the mahogany interior. Pair this with a cup of strong black coffee or a tart raspberry tea. The bitterness of the coffee balances the sweetness of the powdered sugar in the frosting, making the whole experience feel a bit more balanced. Serve it on a white plate to make that deep red color really pop. Right then, you've got everything you need. Just remember to be patient with the cooling and the chilling. It's a bit of a wait, but the result is a cake that's velvety, moist, and absolutely worth the effort. Happy baking! |
Recipe FAQs
What cake is safe for diabetics?
No, this cake is not suitable for diabetics. It contains high amounts of both granulated and powdered sugar.
What is the red velvet cake at Dreamlight?
It is a decadent, layered dessert. This specific version focuses on a mahogany red sponge paired with a velvety cream cheese frosting.
What is a dream cake?
A rich, multi textured cake designed for indulgence. This recipe achieves this through a moist cocoa based sponge and a thick, whipped frosting.
What is the unhealthiest cake?
This is a very high calorie option. With 812 kcal per slice, the combination of vegetable oil and heavy sugar makes it an extremely indulgent treat.
Why did my cake sink in the middle?
Avoid opening the oven door too early. This lets out heat and causes air bubbles to collapse, or it may be due to using too much baking soda.
How to store the assembled cake?
Keep it in an airtight container in the refrigerator. Because of the cream cheese frosting, this cake must be chilled and will stay fresh for about 5 days.
How to use leftover cake scraps?
Mix the crumbs with frosting to roll into balls. If you enjoyed mastering the crumb texture here, see how the same principle works in our cake pops recipe.
Red Velvet Dream Cake

