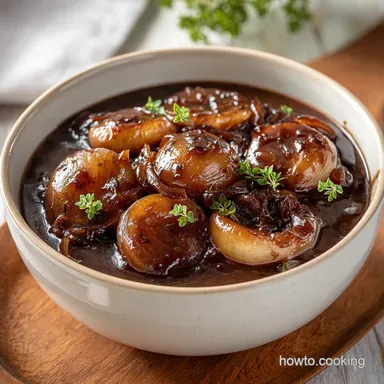
Onion Gravy: Velvety and Savory
- Time: 5 min active + 20 min cook = 25 min total
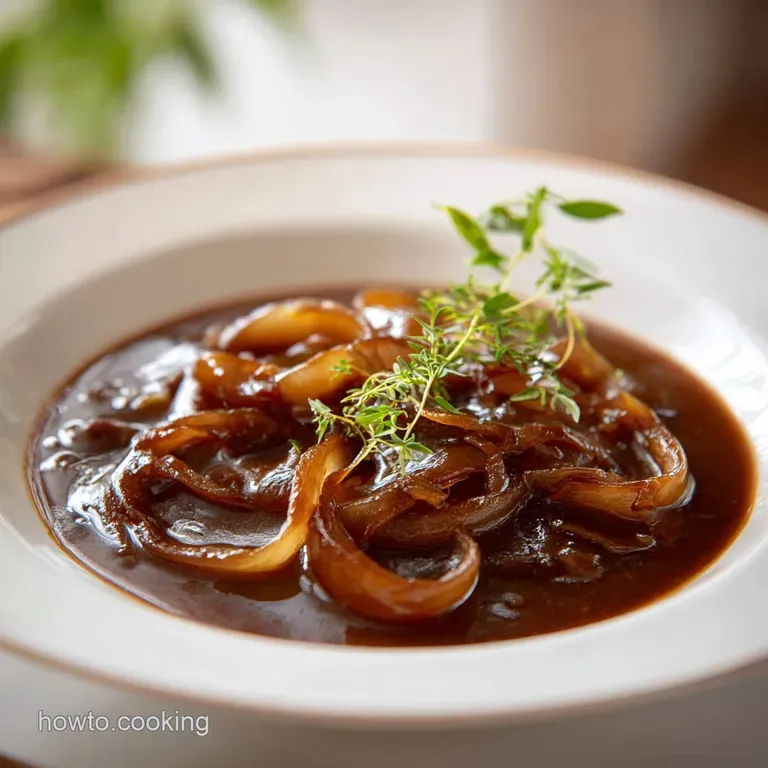
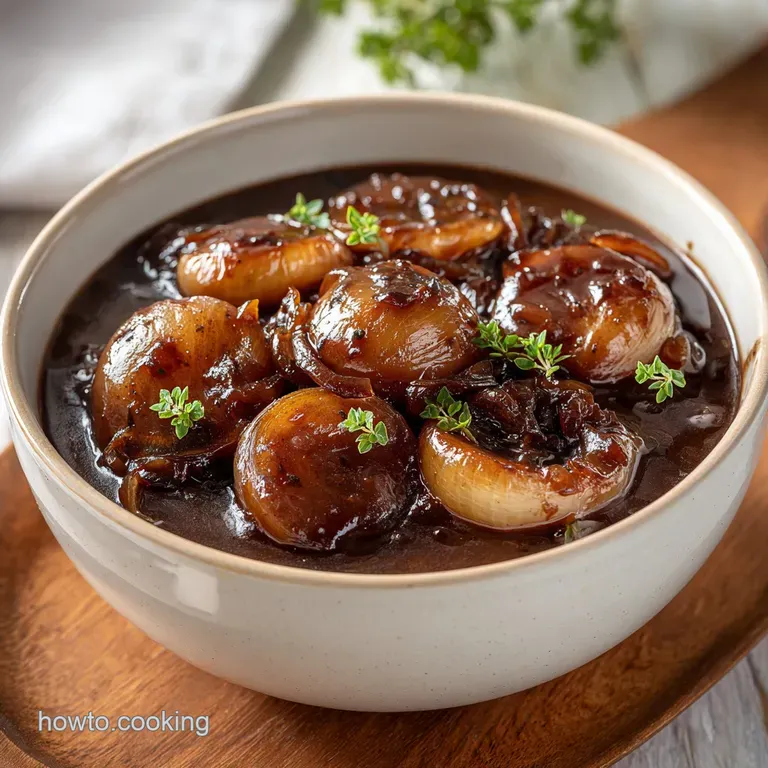
- Flavor/Texture Hook: Velvety, mahogany colored sauce with tender, sweet onions
- Perfect for: Bangers and mash, roast beef, or a rainy Tuesday comfort meal
That specific hiss of butter hitting a hot pan, followed by the sweet, sharp aroma of slicing yellow onions, is basically my favorite scent in the world. There's something about that transition from raw and pungent to soft and golden that just makes a house feel like a home.
For a long time, I believed the myth that you had to spend three hours hovering over a pot to get a deep flavor. I used to think that if I didn't painstakingly caramelize my onions until my arm ached from stirring, the result would be bland.
I spent an entire Sunday once trying to "slow cook" a batch, only to have them turn into a mushy, flavorless paste because I dropped the heat too low.
Then I realized that we can cheat the system. By using a few umami rich ingredients and the right heat, you can get that rich, dark Onion Gravy in a fraction of the time. This version is my go to because it's honest and fast, giving you that concentrated, savory punch without the all day commitment.
It's the kind of sauce that makes even a cheap pack of sausages feel like a feast.
The Secret to Rich Onion Gravy
Most people think the depth comes only from time, but it actually comes from the breakdown of sugars and the addition of salty, fermented accents. When we cook onions, we're essentially concentrating their natural sugars.
By adding a splash of soy sauce and Worcestershire, we're mimicking the depth of a long simmered stock.
The key is the "fond", those little brown bits that stick to the bottom of the pan. If you leave those behind, you're throwing away the best part. When the beef broth hits that hot pan, it lifts those particles back into the sauce, which is why the color turns that gorgeous, dark mahogany instead of a pale tan.
To get the most out of your ingredients, you can check out the USDA FoodData Central to see how different onion varieties vary in sugar content, though yellow onions remain the gold standard for this specific profile.
How the Flavor Actually Develops
- Sugar Concentration: Heat breaks down the cell walls of the onions, releasing sugars that brown and sweeten.
- The Flour Bridge: Adding flour creates a roux with the butter, which binds the fat to the liquid for a silky finish.
- Umami Layering: Soy and Worcestershire provide glutamates, which trick your tongue into thinking the sauce simmered for hours.
- Deglazing Action: The liquid broth dissolves the caramelized proteins on the pan, integrating them into the gravy.
| Method | Time | Texture | Best For |
|---|---|---|---|
| Fresh Sauté | 25 minutes | Velvety with chunks | Daily meals |
| Slow Caramelized | 2 hours | Jammy and thick | Special occasions |
| Instant Mix | 5 minutes | Grainy/Smooth | Emergency meals |
The difference between using fresh onions and a shortcut powder is night and day. Fresh onions provide a structural contrast, giving you those soft, melting bites that break up the richness of the sauce.
Component Analysis
Understanding what each ingredient does helps you tweak the recipe on the fly. If you've ever had a sauce that felt "flat", it's usually because one of these roles wasn't fulfilled.
| Ingredient | Science Role | Pro Secret |
|---|---|---|
| Unsalted Butter | Fat Medium | Allows onions to brown without burning too fast |
| All purpose Flour | Starch Thickener | Cooks out the "raw" taste to create a smooth body |
| Beef Broth | Flavor Base | Provides the collagen and salt for the liquid |
| Soy Sauce | Color & Umami | Deepens the hue and adds a salty, fermented edge |
Shopping List Breakdown
I prefer yellow onions over white because they have a higher sugar content, which means they brown faster and taste sweeter. Don't bother with red onions here; they can turn a weird grey purple color when simmered in broth.
- Unsalted Butter (3 tbsp / 42g)Why this? Control over salt levels while providing a rich base
- Substitute: Olive oil (less richness, cleaner taste)
- Yellow Onions (2 large / 300g), thinly slicedWhy this? Best balance of sulfur and sugar for browning
- Substitute: White onions (sharper, less sweet)
- All purpose Flour (3 tbsp / 25g)Why this? Standard thickening power for a velvety coat
- Substitute: Cornstarch (slurry method, creates a glossier, thinner feel)
- Salt (1/2 tsp / 3g)Why this? Draws moisture out of onions for faster browning
- Substitute: Sea salt for a cleaner mineral taste
- Black Pepper (1/4 tsp / 1g)Why this? Adds a subtle heat to cut through the fat
- Substitute: White pepper for a more integrated, floral heat
- Beef Broth (3 cups / 710ml)Why this? Deep, meaty foundation for the sauce
- Substitute: Vegetable broth (lighter, works for vegetarian versions)
- Worcestershire sauce (1 tbsp / 15ml)Why this? Adds tang and complex fermented notes
- Substitute: A splash of balsamic vinegar (adds sweetness and acidity)
- Soy sauce (1 tsp / 5ml)Why this? Intense color and salty depth
- Substitute: Tamari for a gluten-free option
Equipment Needed
You don't need a fancy kitchen, but a heavy bottomed skillet is non negotiable. Thin pans create "hot spots" that burn the onions in one area while leaving the rest raw. I usually use a cast iron skillet or a stainless steel saucepan.
A whisk is your best friend here. While a spoon works, a whisk ensures that the flour and broth integrate without leaving those annoying little white clumps. If you're feeling lazy, a sturdy fork can work in a pinch, but a whisk is just better.
Finally, have a sharp chef's knife. Thinly sliced onions brown more evenly than chunky ones. If the slices are uneven, some will turn to mush while others stay crunchy, which ruins the velvety mouthfeel.
Key Steps
Right then, let's crack on with the cooking. Keep your heat at a steady medium; if the butter starts to smoke, turn it down immediately.
- Melt the butter over medium heat in a heavy bottomed skillet or saucepan. Note: Wait until it foams to ensure the pan is hot enough.
- Add the sliced onions and cook, stirring occasionally, until they transition from translucent to a deep, golden brown (about 10-12 minutes).
- Sprinkle the flour over the browned onions and stir constantly for 1–2 minutes until the flour is fully absorbed and smells slightly nutty.
- Slowly pour in the beef broth while whisking or stirring vigorously to prevent lumps. Note: Add it in three stages, stirring fully between each pour.
- Stir in the Worcestershire sauce and soy sauce.
- Bring to a gentle simmer for 5–10 minutes until the sauce is velvety and coats the back of a spoon.
Chef's Tip: If you want a deeper color without adding more soy sauce, try adding a tiny pinch of brown sugar during step 2. It helps the onions caramelize even faster.
What Can Go Wrong (and How to Fix It)
Even for those of us who live in the kitchen, things happen. Maybe the heat was too high, or the broth was too thin. Don't panic; almost every Onion Gravy mistake is fixable.
Troubleshooting Common Issues
| Issue | Solution |
|---|---|
| Why Your Gravy is Lumpy | Lumps usually happen when the flour isn't cooked through or the broth is added too quickly. The flour clumps together into little dough balls that refuse to break. If this happens, don't throw it out. |
| Why Onions Burnt | If your onions go from golden to black, you've gone too far. Burnt onions taste bitter and will ruin the whole pot. If they're just slightly overdone, you can save it. But if they're black, start over |
| Why Sauce is Too Thin | Sometimes the reduction takes longer than expected, and you're left with a soup instead of a sauce. You can fix this by simmering it for another 5 minutes. If it's still too thin, mix a teaspoon of co |
Quick Fix Checklist
- ✓ Use a heavy pan to avoid hot spots
- ✓ Stir the flour for at least 60 seconds
- ✓ Add liquid slowly in stages
- ✓ Simmer until it coats a spoon
Flavor Variations to Try
Once you've got the base down, you can really play around with this. It's a very forgiving recipe. For those who love an earthy vibe, try adding 100g of sliced cremini mushrooms. Sauté them with the onions from the start until they've released their moisture and turned brown.
If you're going for a vegetarian onion gravy, simply swap the beef broth for a high-quality mushroom broth or a rich vegetable stock. To keep that meaty depth, add a teaspoon of tomato paste and a bit more soy sauce. It's a great way to make the dish inclusive for everyone.
For a creamier onion gravy, stir in 2 tablespoons of sour cream or heavy cream right at the end, after you've taken the pan off the heat. This gives it a luxurious, French onion soup feel that is incredible over mashed potatoes. If you enjoy other savory sides, this pairs beautifully with my Sausage Herb Stuffing for a full comfort feast.
Adjusting the Volume
If you're just cooking for one, you can halve the recipe easily. Just be mindful that the liquid will evaporate faster in a large pan, so you might need an extra splash of broth to keep it from becoming too thick.
When doubling or tripling for a crowd, don't just double the salt and soy sauce. Start with 1.5x the seasonings, taste it, and then add more. Liquids can be doubled, but intense flavors can become overwhelming if scaled linearly.
Also, work in batches if your pan isn't large enough; overcrowding the pan steams the onions instead of browning them.
Storage and Keep Fresh
This Onion Gravy actually tastes better the next day because the flavors have more time to meld. Store it in an airtight container in the fridge for up to 4 days. When you reheat it, it might look like a thick jelly - that's normal! Just add a splash of water or broth and heat it gently on the stove.
For long term storage, this freezes surprisingly well. Put it in freezer safe bags or containers for up to 3 months. Thaw it in the fridge overnight before reheating. Avoid microwaving it on high, as the fat can separate; a low simmer on the stove is the way to go.
To keep things zero waste, don't toss those onion peels and the ends of the onions. Throw them in a freezer bag with some carrot scraps and celery ends. Once the bag is full, boil them with water to make a homemade vegetable stock that you can use as the base for your next batch of gravy.
What to Serve This With
The most classic pairing is undoubtedly bangers and mash. The saltiness of the sausages and the creaminess of the potatoes are the perfect canvas for the sweet, savory Onion Gravy. If you're feeling fancy, add a side of steamed peas or honey glazed carrots.
It's also a winner over a roast beef dinner. Instead of a standard brown gravy, the onion version adds a layer of sweetness that cuts through the richness of the meat. For something different, try pouring it over a toasted sourdough slice with a melted piece of Gruyère cheese for an open faced sandwich.
If you're in the mood for something heartier, this sauce is great stirred into a bowl of polenta or poured over a big heap of cauliflower mash for a lower carb option. For another comforting meal, you might enjoy my Chicken and Dumplings which shares that same "hug in a bowl" energy. Trust me on this, once you start making homemade Onion Gravy, the store-bought granules will never satisfy you again.
Recipe FAQs
How do I make an onion gravy?
Melt butter over medium heat and sauté sliced onions until deep golden brown. Stir in flour for 1-2 minutes, then slowly whisk in beef broth. Finish by adding Worcestershire and soy sauce and simmering for 5-10 minutes.
Is it true that I should follow a 3-2-1 rule for the best gravy?
No, this is a common misconception. This recipe achieves a velvety texture using equal parts butter and flour (3 tbsp each) with 3 cups of beef broth.
Can a diabetic eat gravy?
Yes, but in moderation. The flour and soy sauce contain carbohydrates that can impact blood sugar levels.
What's the secret to a rich onion gravy?
Sauté the onions until they are a deep, golden brown. This caramelization, paired with soy and Worcestershire sauce, provides a savory depth. If you enjoyed mastering this browning technique, see how the same principle works in our lamb shepherds pie.
Why is my onion gravy lumpy?
Lumps occur when flour isn't cooked through or broth is added too quickly. To prevent this, stir flour constantly for 1-2 minutes and whisk vigorously while pouring in the liquid.
How do I store and reheat leftover gravy?
Store in an airtight container in the fridge for up to 4 days. Reheat gently on the stove with a splash of water or beef broth to restore the smooth consistency.
Can I freeze onion gravy?
Yes, it freezes well for up to 3 months. Thaw it in the fridge overnight and reheat via a low simmer on the stove to prevent the fat from separating.
Savory Onion Gravy