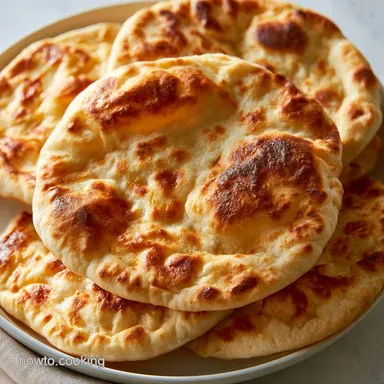
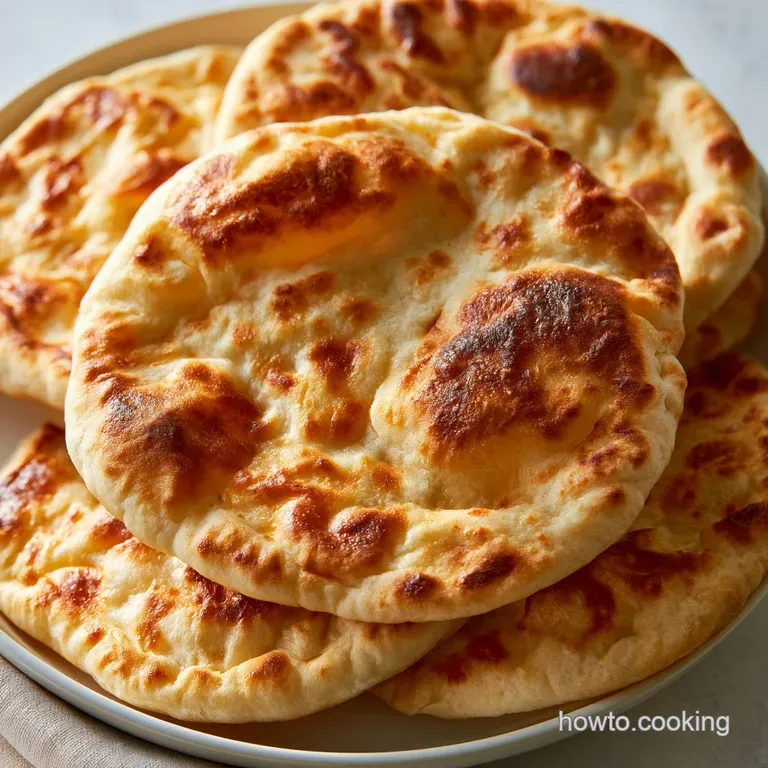
Homemade Pita Bread: Fluffy and Pillowy
- Time: 20 min active + 60-75 min rising = Total 2 hours 10 mins
- Flavor/Texture Hook: Charred, steamy, and pillowy
- Perfect for: Weeknight gyros, homemade hummus dipping, or meal prep
Simple Homemade Pita Bread Recipe
The smell of toasted flour and yeast hitting a hot pan is honestly one of my favorite kitchen scents. But let's be real, the first time I tried this, it was a total disaster. I ended up with eight sad, flat discs that looked more like thick tortillas than pita.
There was no pocket, no puff, just a dense piece of dough that felt like a coaster. It's a common frustration, and usually, it comes down to two things: the pan wasn't hot enough or the dough was rolled unevenly.
The secret is all in the heat shock. When the dough hits a screaming hot surface, the water inside turns to steam instantly. If the dough is the same thickness everywhere, that steam pushes the layers apart, creating the pocket we're all after.
Once you get that first one to inflate like a balloon, it's the most satisfying feeling in the world.
This homemade pita bread recipe is designed to be straightforward and budget friendly. You don't need fancy equipment or expensive ingredients to get a professional result. We're using basic pantry staples to create a bread that's far superior to the store-bought versions that often feel dry or rubbery.
Let's get into how to actually make it work.
Why the Dough Puffs
The "magic" of the pocket isn't actually magic, it's just a bit of physics. Here is what is happening in your pan:
- Rapid Steam: When the dough hits the high heat, the moisture in the center evaporates instantly, creating a high pressure steam bubble.
- Gluten Stretch: Bread flour provides the strength needed for the dough to stretch without tearing, trapping that steam inside.
- Bottom Seal: The quick sear on the bottom creates a temporary seal, forcing the steam to push the top layer upward.
- Uniformity: A consistent thickness ensures the steam distributes evenly, preventing "weak spots" where the air could leak out.
| Method | Time | Texture | Best For |
|---|---|---|---|
| Stovetop | Fast | Charred, airy | Individual portions, maximum puff |
| Oven | Slower | Uniform, softer | Large batches, consistent browning |
I've found that the stovetop method is almost always better for a budget cook because you don't have to preheat a massive oven or buy a pizza stone. A simple cast iron skillet does the job perfectly.
Component Analysis
Understanding your ingredients helps you fix things on the fly. If the dough feels too sticky, you'll know why.
| Ingredient | Science Role | Pro Secret |
|---|---|---|
| Bread Flour | Structural Protein | Higher gluten than AP flour for a better puff |
| Instant Yeast | Gas Production | Use "Instant" to skip the long proofing wait |
| Sea Salt | Flavor & Control | Tightens the gluten structure and slows yeast |
| Olive Oil | Flexibility | Keeps the crumb tender and prevents sticking |
Pantry List Breakdown
Stick to these measurements for the best results. I've used grams because it's way more accurate than cups, especially with flour.
- 3 cups (375g) bread flour Why this? Higher protein creates stronger air pockets (Substitute: All purpose flour, though the puff will be slightly less dramatic)
- 1 cup (235ml) warm water Why this? Activates yeast without killing it (Substitute: Warm milk for a softer, richer bread)
- 2 1/4 tsp (7g) instant yeast Why this? Faster rise and more reliable (Substitute: Active dry yeast, but you must bloom it longer)
- 1 1/2 tsp (9g) sea salt Why this? Enhances the wheat flavor (Substitute: Kosher salt, adjust amount slightly)
- 1 tbsp (15ml) extra virgin olive oil Why this? Adds a hint of fruitiness (Substitute: Vegetable oil for a neutral taste)
- 1 tbsp (15ml) extra virgin olive oil (for greasing the bowl)
Necessary Kitchen Tools
You don't need a bakery's worth of gear. A few basics will do.
For the Dough I suggest a large mixing bowl and a sturdy spatula. If you have a stand mixer, it'll save your arms during the kneading phase, but doing it by hand is just as effective. A digital scale is a huge help here for precision.
For the Pan A cast iron skillet is the gold standard here because it holds heat so well. If you don't have one, a heavy bottomed stainless steel pan works too. Avoid non stick pans if possible, as they often don't reach the high temperatures needed for the puff.
Step by step Process
Right then, let's get cooking. Trust me on the temperature - the pan needs to be hot.
- Combine warm water and yeast in a mixing bowl. Let it sit for 5 minutes until it looks foamy on top. Note: If it doesn't foam, your yeast might be dead.
- Stir in the olive oil, salt, and bread flour using a spoon or spatula.
- Knead the dough for 5-7 minutes. Work it on a floured surface until the surface is smooth and springs back when you poke it with a finger.
- Place the dough in a greased bowl and cover it with a damp cloth. Let it rise in a warm spot for 60-75 minutes until it has doubled in size.
- Punch down the risen dough with your fist to release the built up air.
- Divide the dough into 8 equal portions. Roll them into smooth, tight balls.
- Use a rolling pin to flatten each ball into a circle about 1/4 inch (6mm) thick. Ensure the edges are as thin as the center.
- Heat your cast iron skillet over medium high heat with a touch of olive oil.
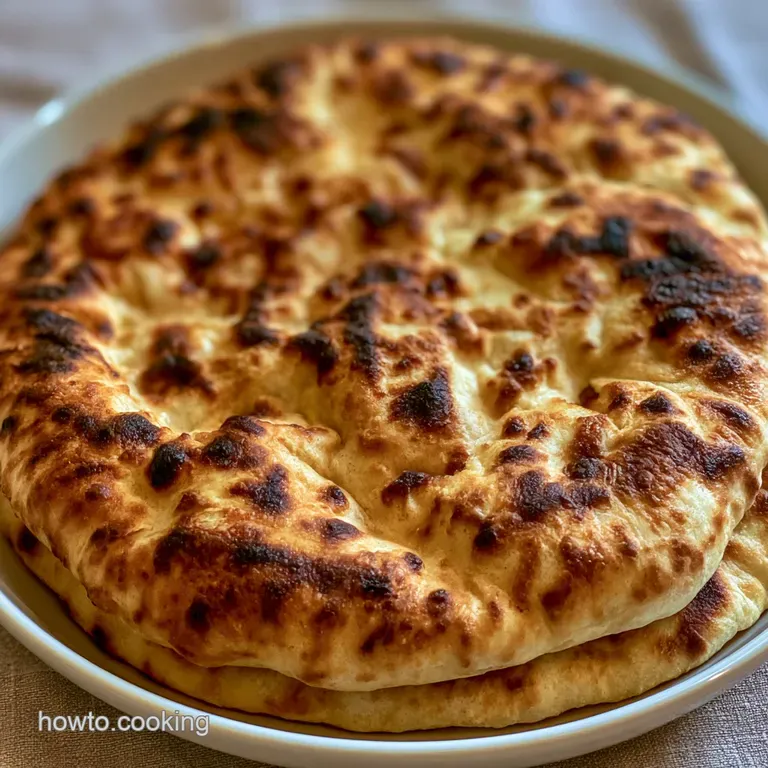
- Lay the dough circle in the pan. Cook for about 30 seconds until small bubbles start to form, then flip.
- Cook for 1-2 minutes until mahogany colored spots appear, then flip one last time.
- Wait for the pita to fully inflate and char before removing it immediately from the pan.
Chef's Tip: If you see a bubble forming but it's not quite "puffing", gently press the edges of the pita with your fingers to encourage the air to move to the center.
Common Baking Fixes
Even with a great homemade pita bread recipe, things can go sideways. It usually happens during the cooking phase.
Why didn't my pita puff?
This is the most common issue. It's almost always because the pan wasn't hot enough or the dough was too thick in some areas. If the heat isn't intense, the steam doesn't build up fast enough to lift the dough. Also, check for any small tears in the dough - air leaks out of holes!
The dough is too sticky
If you're struggling to knead the dough, you might have a humid kitchen or your flour is a bit light. Don't just dump in more flour, as that makes the bread dense. Instead, lightly oil your hands.
My pitas turned out hard
Overcooking is the culprit here. If you leave them in the pan too long after they puff, you're essentially drying them out into crackers. As soon as they inflate and have those nice brown spots, get them out.
| Problem | Root Cause | Solution |
|---|---|---|
| No pocket | Pan temperature too low | Increase heat; wait for oil to shimmer |
| Rubbery texture | Over kneading or too much flour | Stop kneading once smooth; weigh flour |
| Burnt outside | Heat too aggressive | Lower heat slightly; flip more quickly |
Essential Success Checklist:
- ✓ Pan is hot enough to sizzle immediately
- ✓ Dough rolled to a uniform 6mm thickness
- ✓ No visible holes or tears in the dough circles
- ✓ Yeast was foamy before adding flour
Creative Flavor Twists
Once you've mastered the basic homemade pita bread recipe, you can start playing with the dough. Since this is a budget friendly base, adding a few cheap pantry items can change the whole vibe.
For a more nutritious option, try a whole grain blend. Replace one cup of bread flour with whole wheat flour. Note that whole wheat absorbs more water, so you might need an extra tablespoon of water to keep it from being too dry.
If you're looking for something really unique, try adding a teaspoon of garlic powder and some dried oregano directly into the flour.
Some people love a pita bread recipe with greek yogurt. Replacing a portion of the water with yogurt makes the bread softer and adds a slight tang. It's a great way to use up a half empty container of yogurt.
For those avoiding yeast, a pita bread recipe without yeast usually relies on baking powder, which results in a denser, more "flatbread" style result rather than a puffy pocket.
If you want to pair these with something filling, they're great for homemade falafel wraps or served alongside a big bowl of creamy homemade hummus.
Dough Adjustment Guidelines
You don't always need eight pitas. Here is how to handle different batch sizes.
Scaling Down (Half Batch) If you only need 4 pitas, just halve everything. Be careful with the yeast - use a precise measuring spoon. Since there's less mass, the dough might rise slightly faster, so start checking it at the 45 minute mark. Use a smaller skillet so the heat stays concentrated.
Scaling Up (Double Batch) When making 16 pitas, don't double the salt exactly; use about 1.5x the salt to avoid an overly salty taste. I recommend working in batches for the cooking process. If you crowd the pan or try to cook too many at once, the pan temperature will drop, and you'll lose that puff.
Baking Adjustments If you decide to use an oven instead of a pan, set it to 230°C (450°F). Place the pitas on a preheated baking sheet. They will take about 3-5 minutes per side.
Note that they won't get that same charred, smoky flavor as the stovetop method.
Baking Truths
There are a few things people tell you about flatbreads that just aren't true.
The Pizza Stone Myth You'll often see recipes insisting on a pizza stone for a "professional" puff. While they're great, a cast iron skillet actually provides more direct, intense heat for a single pita. You don't need to spend $40 on a stone for this.
The Long Rise Myth Some people say you need to let the dough rise for hours to get the best flavor. While a slow rise (in the fridge) adds complexity, for a simple homemade pita bread recipe, a 60 minute room temperature rise is plenty. The puff comes from the heat, not the fermentation.
Storage and Reheating
Homemade bread doesn't have the preservatives of store-bought packs, so you have to be a bit smarter about how you keep it.
Storage Guidelines Keep your pitas in a sealed plastic bag or an airtight container. In the fridge, they'll stay fresh for about 3 days. However, they can get a bit stiff in the cold. For longer storage, the freezer is your best friend.
Freeze them in a single layer on a tray first, then toss them into a bag. They'll last for 3 months.
Reheating for Freshness Never microwave a pita for more than 10 seconds, or it'll turn into rubber. The best way to revive them is to toss them in a hot dry pan for 30 seconds per side. This brings back that slight crispness and softens the interior.
Zero Waste Tips If you have leftover dough that didn't make it into a pita, don't toss it! Roll it out very thin, brush it with olive oil and salt, and bake it at 200°C (400°F) for 8 minutes. You've just made homemade crackers.
You can also use any scraps to make a quick focaccia style side for dinner.
Best Serving Ideas
The beauty of this bread is its versatility. Because it's a neutral, salty base, it works with almost anything.
For a classic Mediterranean spread, fill the pockets with grilled meats, sliced cucumbers, tomatoes, and a dollop of tzatziki. If you're feeling the chicken route, these pair perfectly with chicken meatballs and tzatziki.
For a budget friendly snack, just toast the pita, rub a raw garlic clove on the surface, and drizzle with olive oil. It's simple, but the aroma is incredible. Whether you're using them for a full meal or just a quick snack, having a fresh homemade pita bread recipe in your rotation is a total game changer for your kitchen.
Recipe FAQs
What is the difference between pita and Greek style pita bread?
Greek pita is softer and thicker. Traditional pita creates a hollow pocket for stuffing, whereas Greek style is fluffier and typically used for dipping or wrapping gyros.
What is the secret to perfect pita?
A very hot pan and uniform rolling. High heat creates the steam needed to puff the bread, and rolling each ball to a consistent 1/4 inch thickness ensures they inflate evenly.
Are pitta breads good for diabetics?
It depends on the portion size. Because this recipe uses refined bread flour, it can cause blood sugar spikes if consumed in large quantities.
Is pita bread good for heart patients?
Yes, in moderation. This recipe uses extra virgin olive oil, providing heart healthy fats compared to the processed shortenings found in many store-bought brands.
How to prevent pita from becoming rubbery when reheating?
Heat for no more than 10 seconds in the microwave. Exceeding this time breaks down the dough structure and ruins the texture.
Why didn't my pita bread puff up?
The skillet likely wasn't hot enough. Medium high heat is required to flash steam the dough, which is the only way to force the bread to inflate.
Can I use this dough for other breads?
Yes, you can adapt the base. If you enjoyed working with high hydration dough here, see how we adapt it for a honey sourdough loaf.
Homemade Pita Bread Recipe