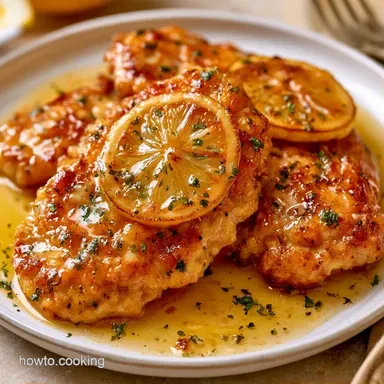
Lemon Herb Butter Chicken: Crispy Skin
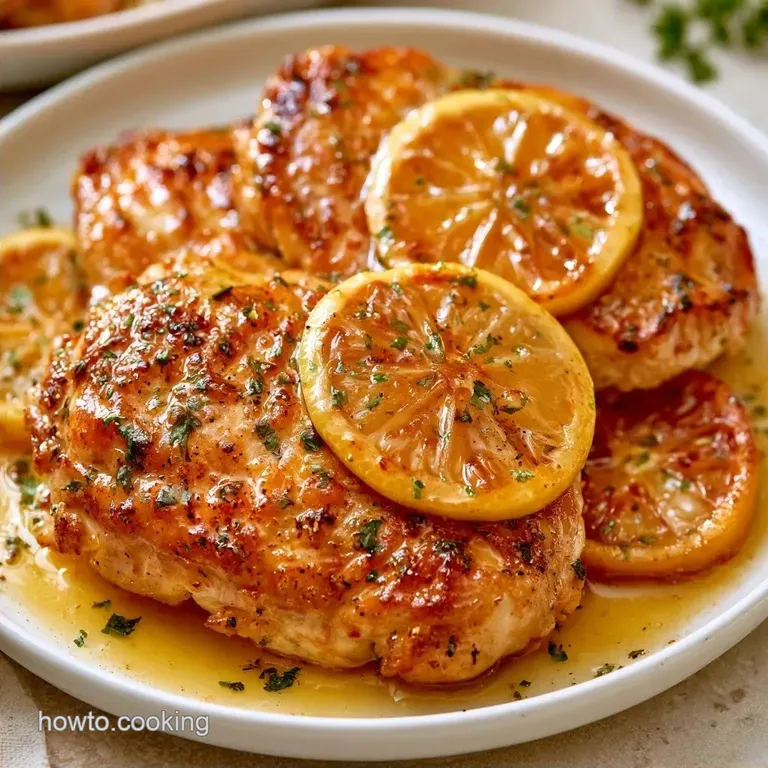
- Time: 10 min prep + 45 min roasting
- Sensory Appeal: Shattering skin with a zesty, herb-infused finish
- Perfect for: A weeknight dinner that feels like a gourmet bistro meal
The scent of garlic browning in butter and fresh lemon hitting a searing pan is enough to stop anyone in their tracks. In many Mediterranean homes, chicken is more than just a protein it is the centerpiece.
These recipes often use simple, premium fats and fresh herbs to let the natural taste of the bird stand out without the need for heavy sauces.
The goal here is the contrast between the bright, acidic lemon and the rich, salty butter. I previously just roasted thighs in the oven, but they often ended up with rubbery skin. Learning to render the fat first is what makes the difference.
You can expect a meal that looks like it required hours of effort but actually fits into a tight schedule. This Lemon Herb Butter Chicken prioritizes technique over complexity, ensuring the meat stays tender while the skin reaches an audible crunch.
Why the Method Works
Cold Start Searing: Placing skin side down in a cold pan renders the fat slowly. This prevents the skin from shrinking and makes it much crispier.
Butter Basting: Using butter as a vehicle for herbs pushes flavor deep into the meat. The fat protects the surface from the harsh, dry heat of the oven.
Serious Eats' testing shows that starting in a cold pan leads to a more uniform brown across the skin than dropping meat into shimmering oil.
| Feature | Fresh Herb Butter | Dried Herb Shortcut |
|---|---|---|
| Aroma | Bright and floral | Muted and earthy |
| Skin Texture | Glossy and crisp | Slightly grittier |
| Prep Time | 10 minutes | 5 minutes |
Ingredient Role Breakdown
| Component | Purpose | Substitute Notes |
|---|---|---|
| Unsalted Butter | Fat carrier for flavor | Salted butter works, just cut the added salt |
| Fresh Lemon | Cuts through the richness | Lime adds a tropical twist but changes the profile |
| Bone in Thighs | Keeps meat juicy | Boneless thighs cook 15 mins faster |
| Fresh Rosemary | Earthy, piney notes | Dried rosemary is stronger, use half the amount |
The Full Shopping List
- 4 bone in, skin on chicken thighs (approx. 2 lbs / 900g)
- 1 tsp kosher salt Why this? Larger grains allow for more controlled seasoning
- ½ tsp cracked black pepper
- 1 tsp garlic powder
- ½ cup unsalted butter, softened Why this? Softened butter mixes easier with herbs
- 2 tbsp fresh lemon juice
- 1 tbsp lemon zest, finely grated
- 2 cloves garlic, minced
- 1 tbsp fresh rosemary, finely chopped
- 1 tbsp fresh thyme, finely chopped
- 1 tbsp fresh parsley, minced
Essential Kitchen Tools
While any home setup works, a heavy bottomed pan is essential. A cast iron skillet is the ideal choice here, as it distributes heat consistently and is oven safe after searing.
I also recommend using a digital meat thermometer. Trying to guess doneness by poking the meat often leads to overcooking; a simple probe allows you to hit that 165°F mark precisely.
Lastly, have some paper towels on hand. Surface moisture is the primary enemy of a crisp crust, so thoroughly drying the chicken is a mandatory step.
Cooking Flow and Steps
For the Chicken Prep
- Use paper towels to pat the chicken thighs completely dry. Season them generously with salt, pepper, and garlic powder. Note: Dry skin is the key to a superior sear
Phase 1: Searing for Texture
- Place the thighs skin side down in a cold cast iron skillet.
- Increase the heat to medium high. Cook for 6–8 minutes until the skin is golden brown and pulls away easily.
Phase 2: Applying the Flavor Base
- Flip the chicken to the flesh side.
- Combine softened butter, lemon juice, zest, minced garlic, rosemary, and thyme in a small bowl.
- Add a large dollop of this herb butter to each thigh. Note: It should begin foaming immediately
Phase 3: The Basting and Roast
- Slide the skillet into an oven set to 400°F (200°C).
- Every 15 minutes, spoon the bubbling butter from the pan over the skin.
- Roast until the meat reaches an internal temperature of 165°F (74°C) and the skin is mahogany.
Phase 4: The Finishing Touch
- Remove from the oven and let the meat rest in the pan for 5 minutes.
- Garnish with fresh minced parsley and a final squeeze of lemon juice.
Fixing Common Pan Issues
For Burnt Butter
If the butter foams too aggressively or turns dark brown too quickly, your oven might be running hot. Lower the heat by 25°F and add a small knob of fresh butter to the pan. This cools the base and gives you a fresh layer of fat to baste.
For Rubbery Skin
Rubbery skin usually happens when the chicken is crowded in the pan or the heat was too low during the sear. Make sure there is at least an inch of space between each thigh. If the skin doesn't release easily from the pan at 6 minutes, give it another 2 minutes before flipping.
For a Garlic Heavy Punch
If you find the garlic taste too mild, avoid adding it to the butter mix too early. Garlic burns quickly in the oven. Instead, add a few whole smashed cloves to the pan during the roasting phase. This infuses the butter without the bitterness of charred minced garlic.
Adjusting the Serving Size
For two thighs, switch to a smaller 8 inch skillet. An oversized pan can cause the butter to spread too thin and burn before you can baste. Because smaller batches typically cook faster, reduce the roasting time by about 20%.
For larger groups (8+ thighs), sear the meat in batches. Overcrowding the skillet prevents the chicken from browning, causing it to steam instead. Transfer the seared pieces to a large roasting pan. Only increase salt and spices up to 1.5x the original recipe to prevent over seasoning.
| Original Ingredient | Budget Alternative | Impact | Savings |
|---|---|---|---|
| Fresh Rosemary | Dried Rosemary | Less floral, more woody | ~$2.00 |
| Fresh Thyme | Dried Thyme | Muted flavor | ~$1.50 |
| Unsalted Butter | Salted Butter | Slightly saltier sauce | $0.00 |
Debunking Kitchen Myths
Searing meat doesn't "seal in juices." Water is lost during the cooking process regardless of your initial method. The browning primarily serves to improve the flavor and texture of the exterior.
Resting meat isn't just about "letting juices settle" in a static sense. It gives the muscle tissue time to loosen, helping it reclaim some of the moisture that migrated to the center during roasting.
Storage and Scrap Tips
Store remaining portions in a sealed container within the refrigerator for a maximum of 3 days. To reheat, set your oven or air fryer to 350°F and heat for 5-10 minutes to restore the crisp skin. Avoid using a microwave, as it turns the skin soft and ruins the texture.
These thighs will keep in the freezer for 2 months. Let them defrost in the refrigerator overnight before reheating.
Save the pan drippings; simmer any leftover bones or browned bits from the skillet with water and a carrot for a quick, savory stock. This creates an excellent base for a simple gravy.
Fresh Flavor Twists
For a spicy kick, mix a teaspoon of smoked paprika or red pepper flakes into the herb butter. This adds a warmth that complements the citrus. If you're following a keto or low carb focus, this recipe is already compliant, but you can increase the butter slightly for extra fats.
For a Mediterranean twist, swap the rosemary for fresh oregano and add a few kalamata olives to the pan during the last 15 minutes of roasting. If you want something a bit more hearty, you might enjoy my Chicken and Dumplings for a different kind of comfort.
Best Sides for Chicken
This dish pairs naturally with roasted root vegetables or a crisp green salad. A bed of sautéed spinach or steamed asparagus helps balance the richness of the butter.
For a dipping sauce on the side, try a Homemade Ranch Dressing to serve with roasted carrots. The creaminess of the dressing plays well with the acidity of the lemon.
Since the pan already has a rich, herb infused butter sauce, serving this over mashed potatoes or a pile of wild rice is a smart move. The starch soaks up every drop of the Lemon Herb Butter Chicken pan sauce, so nothing goes to waste.
For nutrition data on the chicken thighs, you can check USDA FoodData Central. This ensures you have accurate protein and fat counts for your meal planning.
Recipe FAQs
What are common mistakes when cooking this chicken?
Forget to pat the chicken dry. Moisture on the skin prevents it from getting that shattering crust.
Why is the flavor so intense?
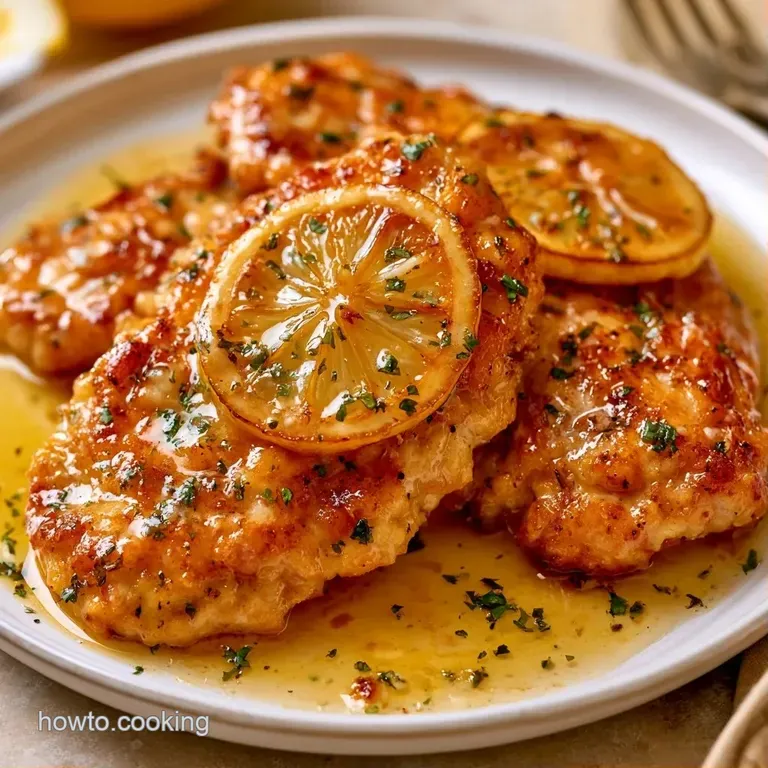
The repeated basting of lemon herb butter creates a deep mahogany glaze. This process infuses the meat with citrus and aromatics while keeping it juicy.
How to make butter basted chicken?
Sear the skin side down in a cold skillet over medium high heat first. Spoon the melted butter over the skin every 15 minutes while roasting at 400°F.
Can I use boneless thighs instead?
Use boneless thighs to reduce the overall cooking time. They pair well with a quick side like sourdough garlic toast.
Is it true that a hot pan creates the best sear?
Actually, no. Starting in a cold cast iron skillet allows the fat to render slowly for a more even, golden brown crust.
Lemon Herb Butter Chicken